
Free course recommendation: Master JavaScript animation with GSAP through 34 free video lessons, step-by-step projects, and hands-on demos. Enroll now →
In this article, we explore the process of voxelizing 3D models, with a focus on creating 3D pixel art using imported glTF models. The article includes a final demo and covers various 3D effects that can be achieved using voxelization. We will provide a step-by-step guide that covers the following topics:
- The mathematical approach for determining if an XYZ coordinate is inside a 3D mesh or not
- Breaking standard Three.js geometries into voxels
- Implementation for imported glTF models
- The limitations and optimizations of the voxelization method
- Ways to style and animate the voxels
Introduction
The concept of voxel representation involves tracing a 3D mesh and filling its volume with basic elements called voxels. While a voxel, which is short for “volume pixel,” is typically rendered as a 3D box, any 3D shape can be used as a voxel in artwork.
Before we can work with voxel style, we need to know how to break down the shape into voxels, i.e., how to locate a set of XYZ coordinates inside the mesh.
Locating coordinates inside the mesh
There’s an elegant trick to determine whether a point is inside a closed 3D mesh. The mesh is considered “closed” when there are no holes or gaps in its surface. Don’t confuse this with the complexity of the mesh itself, which may have all kinds of holes, as long as its surface is continuous.

Let’s test whether a random XYZ coordinate (blue box) is inside a donut shape. To do this, we cast a ray from the XYZ coordinate, count the number of times the ray intersects the mesh surface, and check if the number is odd.
Why odd? Imagine moving along the ray from far away to the XYZ point. We start outside the mesh. After the first intersection, we enter the mesh volume; after the second intersection, we exit; after the third intersection, we enter again; and so on. If the number of intersections is even (including zero), the point is outside the mesh. If the number of intersections is odd, then the point is inside the mesh. As simple as that!
In practice, we count the intersections from XYZ to infinity. It’s easier to explain the trick by counting backwards, but the number of intersections is the same, regardless of the counting direction. Generally, the direction of the ray doesn’t matter, either. If the mesh is closed, we can cast the ray from XYZ to anywhere and get the correct result. The only exception is when the ray is cast in parallel to the mesh surface; in this case, we won’t be able to register the intersection.
Implementation in Three.js
We begin by creating a basic 3D scene with a few lights, a floor plane that receives shadows, a gradient background, an orbit control, and a GUI module for scene settings. The only non-standard thing on the scene below is a lightHolder group that contains lights and the bottom panel. Normally, we use OrbitControls to rotate the camera around the static scene. To create an illusion of a rotating object and a static camera, we can make lightHolder rotate together with the camera on OrbitControls update. It is a nice addition to the Three.js boilerplate but is unrelated to voxelization.
Next, we add the mesh we want to break into voxels. It can be a Sphere, Torus, Torus Knot, or any other closed mesh (for example, LatheGeometry is open and requires more work to handle).
First, we need XYZ coordinates that could be inside the mesh. To obtain them, we go through the mesh bounding box using a predefined grid step. For pixel-style voxels, we use a simple square grid, but coordinate sampling can be a random function or something more advanced.
function voxelizeMesh(mesh) {
    const boundingBox = new THREE.Box3().setFromObject(mesh);

    for (let i = box.min.x; i < box.max.x; i += params.gridSize) {
        for (let j = box.min.y; j < box.max.y; j += params.gridSize) {
            for (let k = box.min.z; k < box.max.z; k += params.gridSize) {
                const pos = new THREE.Vector3(i, j, k);
                if (isInsideMesh(pos, mesh)) {
                    voxels.push({
                        position: pos
                    })
                }
            }
        }
    }
}
Once we have the list of candidate coordinates that could be inside the mesh, we can cast a ray to the negative Y direction from each coordinate using THREE.Raycaster and count the number of intersections. If the number of intersections is odd, we save the coordinate to the voxels array.
function isInsideMesh(pos, mesh) {
    rayCaster.set(pos, {x: 0, y: -1, z: 0});
    rayCasterIntersects = rayCaster.intersectObject(mesh, false);
    // we need odd number of intersections
    return rayCasterIntersects.length % 2 === 1;
}
Important note regarding Three.js implementation: by default, any Three.js material is set to only render the front side of the mesh. This not only affects the appearance of the mesh, but also the behavior of the raycaster. When the material’s side property is set to THREE.Front, the raycaster can only detect intersections with the surface of the mesh as viewed from outside. In order to detect intersections from both inside and outside the mesh, we need to change the material’s side property to THREE.DoubleSide, even if the original mesh won’t be rendered.
const outerShapeGeometry = geometries[params.geometry];
const outerShapeMaterial = new THREE.MeshLambertMaterial({
    color: 0xffff55,
    side: THREE.DoubleSide
});
outerShapeMesh = new THREE.Mesh(outerShapeGeometry, outerShapeMaterial);
Once we have XYZ positions in the voxels array, we can use them to place the voxels.
To draw voxels, a large number of objects with the same geometry and material, but with different positions, are required. This is a perfect use case for Three.js instanced mesh. With instanced mesh, great performance can be achieved while still being able to set colors and transforms for each voxel.
We can create a THREE.InstancedMesh with a number of instances equal to voxels.length. Here are a few points to keep in mind:
- To have a nice pixelated look,
RoundedBoxGeometryis being used. However, it is not included in the basic Three.js build and must be imported manually. - The voxel colors can be simply set as a property of the material for now, but more work will be done with colors later on.
- Making all the voxels cast and receive shadows is quite expensive for performance, but it is still acceptable for the number of voxels in this project.
import {RoundedBoxGeometry} from 'three/addons/geometries/RoundedBoxGeometry.js';

voxelGeometry = new RoundedBoxGeometry(params.boxSize, params.boxSize, params.boxSize, 2, params.boxRoundness);
voxelMaterial = new THREE.MeshLambertMaterial({
    color: new THREE.Color(0xffff55)
});
instancedMesh = new THREE.InstancedMesh(voxelGeometry, voxelMaterial, voxels.length);
instancedMesh.castShadow = true;
instancedMesh.receiveShadow = true;
scene.add(instancedMesh);
The standard approach to set XYZ positions from the voxels array to the instances involves using a dummy object:
dummy = new THREE.Object3D();

for (let i = 0; i < voxels.length; i++) {
    dummy.position.copy(voxels[i].position);
    dummy.updateMatrix();
    instancedMesh.setMatrixAt(i, dummy.matrix);
}
instancedMesh.instanceMatrix.needsUpdate = true
That’s it! Feel free to check out the full code below:
See the Pen Voxelizing Three.js Geometries (the article is coming) by Ksenia Kondrashova (@ksenia-k) on CodePen.
Voxelizing Imported Models
To voxelize an imported scene in a format such as .gltf or .glb, we need to trace each mesh of the scene in the same way as described above. We gather all the meshes from the loaded scene into the importedMeshes array. Even though they won’t be added to the scene to render, we still need to change the material side to THREE.DoubleSide for the raycaster to properly detect both inside-to-outside and outside-to-inside intersections.
We also need to rescale the scene to fit the predefined grid size and scene parameters such as camera, lights, and floor positions. Since we don’t know the size of the imported model, we scale it to match the modelSize value and ensure it’s centered at the origin point (0, 0, 0).
function voxelizeModel(importedScene) {

    const importedMeshes = [];
    importedScene.traverse((child) => {
        if (child instanceof THREE.Mesh) {
            child.material.side = THREE.DoubleSide;
            importedMeshes.push(child);
        }
    });

    // get the size of loaded model
    let boundingBox = new THREE.Box3().setFromObject(importedScene);
    const size = boundingBox.getSize(new THREE.Vector3());
    const scaleFactor = params.modelSize / size.length();
    const center = boundingBox.getCenter(new THREE.Vector3()).multiplyScalar(-scaleFactor);

    // scale model to the standard size and center it
    importedScene.scale.multiplyScalar(scaleFactor);
    importedScene.position.copy(center);

    // recalculate the box for voxelization
    boundingBox = new THREE.Box3().setFromObject(importedScene);

    // go through the grid
    for (let i = boundingBox.min.x; i < boundingBox.max.x; i += params.gridSize) {
        for (let j = boundingBox.min.y; j < boundingBox.max.y; j += params.gridSize) {
            for (let k = boundingBox.min.z; k < boundingBox.max.z; k += params.gridSize) {
                // check if XYZ position is inside one of the meshes
                for (let meshCnt = 0; meshCnt < importedMeshes.length; meshCnt++) {
                    const pos = new THREE.Vector3(i, j, k);
                    const mesh = importedMeshes[meshCnt];

                    // add pos to voxels array if it's inside the mesh
                }
            }
        }
    }
}
We also want to extract colors from the loaded model and save them together with XYZ coordinates. This can be done by gathering the mesh.material.color property.
Additionally, to unify the color palette, I adjust the colors by converting them to the HSL color space, decreasing the saturation, and increasing the brightness. This creates a similar pastel style for colors from different imported models, which looks much better when displayed on the same page.
// no need to specify the color for instanced mesh material
voxelMaterial = new THREE.MeshLambertMaterial({});

function voxelizeModel(importedScene) {

    // ...

    const mesh = importedMeshes[meshCnt];
    const color = new THREE.Color();
    const {h, s, l} = mesh.material.color.getHSL(color);
    color.setHSL(h, s * .8, l * .8 + .2);

    if (isInsideMesh(pos, mesh)) {
        voxels.push({color: color, position: pos});
    }
}

function recreateVoxels() {
    for (let i = 0; i < voxels.length; i++) {

        // add voxel color to each instance
        instancedMesh.setColorAt(i, voxels[i].color);

        dummy.position.copy(voxels[i].position);
        dummy.updateMatrix();
        instancedMesh.setMatrixAt(i, dummy.matrix);
    }
    instancedMesh.instanceColor.needsUpdate = true; // apply the colors
    instancedMesh.instanceMatrix.needsUpdate = true;
}
Great! We have a working voxelizing solution for imported 3D models.
See the Pen Voxelizing glTF Models with Three.js by Ksenia Kondrashova (@ksenia-k) on CodePen.
Limitations
If you surf around the web and try the code above for different models (my ❤️ to poly.pizza), you may see unexpected results for some models. Here are the common problems you may face:
Open meshes
The models aren’t designed for voxelization. 3D artists are doing a good job optimizing their models and removing hidden faces. But once hidden faces are removed, we get open meshes and our ray casting algorithm can produce wrong results. The possible solutions are enclosing the surfaces in Blender or playing with ray direction and other parameters.
For example, on the left picture, we have the avocado model voxelized with the ray casted to negative Y direction, and on the right picture, the ray was looking to positive Y.

Thin meshes
The same model can look quite different with different voxel grid, especially if the model has some thin elements that are hard to “catch” with grid points. Play with cell size and bounding box offsets to get the nice output for your model – even small changes can give you very different results.
For example, the white part of this egg model is pretty thin so from the first run, we don’t have it visible. But if you start increasing a vertical offset to the boundingBox, you can find a good fit and voxelize the mesh properly.

top right: no offset
bottom left: boundingBox.min.y += .1 * params.gridSize
bottom right: boundingBox.min.y += .25 * params.gridSize
Complex materials
Sometimes a single mesh has a combination of materials or has a texture mapped on it. In both cases we can’t take mesh.material.color so voxels colors should be set manually.
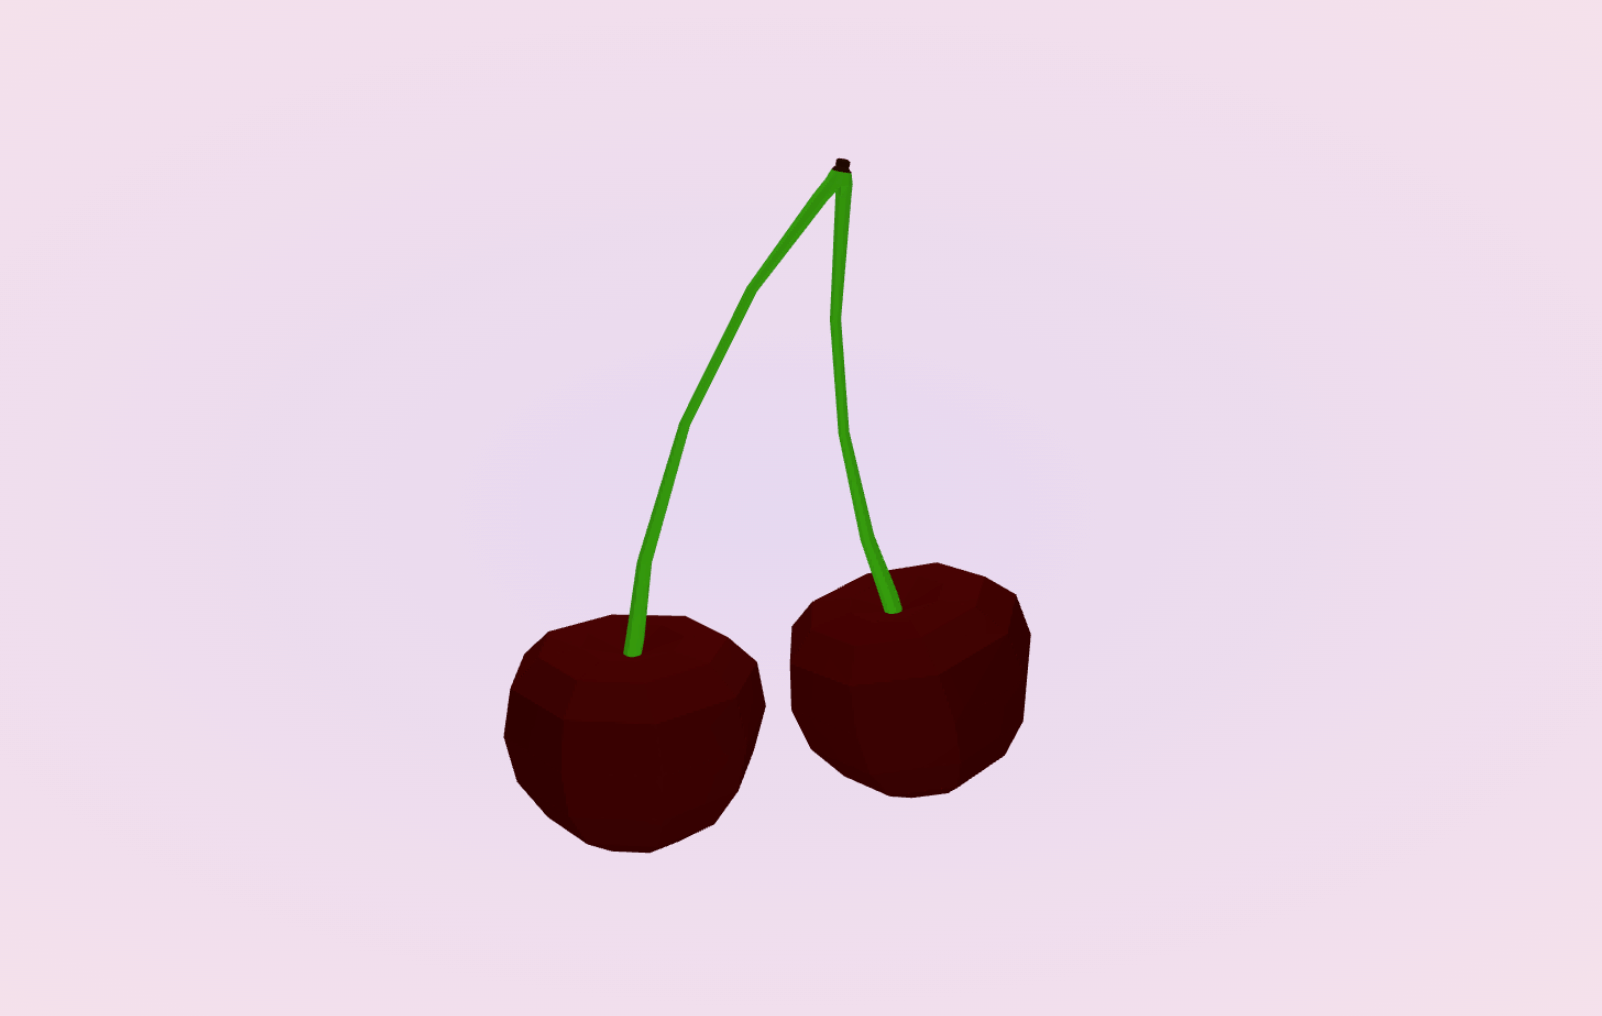
Style varialtions
Before finishing the 3D-pixel demo, let’s think about other fun effects we can get from voxelized cherry model.
Change voxel geometry from rounded box to the lego brick and adjust the grid step along Y axis:
Or switch boxes to spheres and let them move around:
You can take the voxelization even further by experimenting with different voxel geometries, such as styling the sphere as bubbles and letting them burst, or replacing the box geometry with a plane and mapping an alpha texture over it. Similar visuals have been created in a previous tutorial.
Additionally, keep in mind that you can apply different animations to the particles from different meshes. You can also add physics to make the voxels fall and collide, or make them repel from the cursor. The possibilities are endless!
Optimization for 3D Pixels
In the final demo, voxels are created as boxes with size equal to the grid cell size. However, the voxels are standing back-to-back, which means that sometimes we generate a bunch of voxels that are never visible. This can affect performance and increase memory usage.
Let’s consider the voxelization of this red apple. It has some small details, so we choose a relatively small grid.

The total number of voxels can be quite large, but many of them are located inside the mesh and are never visible. To optimize this, we can modify the ray casting algorithm in two ways:
- Replace a single ray with six rays along positive and negative X, Y, and Z axes.
- Save a voxel coordinate not only if it is inside the mesh (has an odd number of intersections), but also if it is close to the mesh surface (has a small distance to the first intersection point).
function voxelizeModel(importedScene) {

    // ...

    for (let meshCnt = 0; meshCnt < importedMeshes.length; meshCnt++) {

        const mesh = importedMeshes[meshCnt];
        const pos = new THREE.Vector3(i, j, k);
        const color = new THREE.Color();
        const {h, s, l} = mesh.material.color.getHSL(color);
        color.setHSL(h, s * .8, l * .8 + .2);

        // this is bad for performance
        if (isInsideMesh(pos, {x: 0, y: 0, z: 1}, mesh)) {
            voxels.push({color: color, position: pos});
            break;
        } else if (isInsideMesh(pos, {x: 0, y: 0, z: -1}, mesh)) {
            voxels.push({color: color, position: pos});
            break;
        } else if (isInsideMesh(pos, {x: 0, y: 1, z: 0}, mesh)) {
            voxels.push({color: color, position: pos});
            break;
        } else if (isInsideMesh(pos, {x: 0, y: -1, z: 0}, mesh)) {
            voxels.push({color: color, position: pos});
            break;
        } else if (isInsideMesh(pos, {x: 1, y: 0, z: 0}, mesh)) {
            voxels.push({color: color, position: pos});
            break;
        } else if (isInsideMesh(pos, {x: -1, y: 0, z: 0}, mesh)) {
            voxels.push({color: color, position: pos});
            break;
        }
    }

    // ...

}

function isInsideMesh(pos, dir, mesh) {
    rayCaster.set(pos, dir);
    rayCasterIntersects = rayCaster.intersectObject(mesh, false);

    // return rayCasterIntersects.length % 2 === 1;
    return (rayCasterIntersects.length % 2 === 1 && rayCasterIntersects[0].distance <= 1.5 * params.gridSize);
}
For this apple model we can reduce the total number of voxels from 13472 to 3677 without any visual change. Plus, thanks to the distance limit, this way we an handle models with open meshes and surfaces that are parallel to world axises.
However, this method is very computationally expensive when using THREE.Raycaster. For complex raycasting you need Bounding Volume Hierarch (BVH), there are tools like three-mesh-bvh available to manage it. Nevertheless, for the purpose of this tutorial, we will keep it simple and use a single-ray method with the ray looking to positive Z (since it works better with the set of models used).
Combining multiple models
To combine several voxelized models on the same page, we can simply create separate containers for each model and add them to the scene. We can also create buttons or other controls to switch between the models. In this case, all the models were downloaded from poly.pizza as .glb files and used without any change.
- Chili Pepper by jeremy [CC-BY] via Poly Pizza
- Chicken by jeremy [CC-BY] via Poly Pizza
- Cherry by Poly by Google [CC-BY] via Poly Pizza
- Banana Bundle byBlenderVoyage
- Bonsai by Don Carson [CC-BY] via Poly Pizza
- Egg sunny side up by Poly by Google [CC-BY] via Poly Pizza
Multi-scene
In addition to the main scene, we have a model selector. On the side panel, we render all the 3D models, with each model on its own little scene. The side scenes are identical, we just change the background color and add GLTF models, making sure they are scaled and centered in the same way. Each side scene is a separate THREE.Scene with its own camera and orbit controls.
For the pixel art view, we have a main THREE.Scene that is set up exactly the same as in the previous examples.
All the scenes share the same <canvas> element and the same THREE.Renderer. There are very handy .setViewport and .setScissor methods of THREE.Renderer to handle multiple scenes. We basically need to:
- Create HTML elements for each scene, including five
<div class="model-prev"></div> elements and one full-screen <div class="container"></div>. - Style the
<div>s with CSS to define their size and position on the screen. - Set
setScissorTest(true)for the renderer. - Calculate the bounding box for each <div> (don’t confuse this native JS
getBoundingClientRect()with the Three.js bounding box). - On each frame, render each scene and provide the bounding box data to
renderer.setViewportandrenderer.setScissor.
This is a widely used technique that is not specific to voxelization. You can find the complete code in the repository, or you can also refer to the Three.js example that served as a template for this approach.
Multi-model
For the voxels, we can still use a single THREE.InstancedMesh object. We load, scale, and trace all the models to voxels in the same way as before. However, instead of storing positions and colors of voxels directly in the voxels array, we store them in the new two-dimensional voxelsPerModel array. The voxels array now only keeps the current voxels used for rendering.
function loadModels() {

    recreateInstancedMesh(100);

    const loader = new GLTFLoader();
    let modelsLoadCnt = 0;
    modelURLs.forEach((url, modelIdx) => {

        // prepare <div> and Three.js scene for model preview
        const scene = createPreviewScene(modelIdx);
        previewScenes.push(scene);

        // load .glb file
        loader.load(url, (gltf) => {

            // add scaled and centered model to the preview panel;
            addModelToPreview(modelIdx, gltf.scene)

            // get the voxel data from the model
            voxelizeModel(modelIdx, gltf.scene);

            // recreate the instanced mesh with new size
            const numberOfInstances = Math.max(...voxelsPerModel.map(m => m.length));
            if (numberOfInstances > instancedMesh.count) {
                recreateInstancedMesh(numberOfInstances);
            }

            // once all the models are loaded...
            modelsLoadCnt++;
            if (modelsLoadCnt === 1) {
                // Once we have once voxelized model ready, start rendering the available content
                updateSceneSize();
                render();
            }
            if (modelsLoadCnt === modelURLs.length) {
                // Once we have all the models voxelized, start available content
                animateVoxels(0, activeModelIdx);
                setupSelectorEvents();
            }
        }, undefined, (error) => {
            console.error(error);
        });
    })
}
In the code above, we recreate both the voxels array and THREE.InstancedMesh element when every next model is loaded and traced. Alternatively, we could wait for all models to be done, check the total number of voxels using Math.max(...voxelsPerModel.map(m => m.length)), and create the THREE.InstancedMesh just once. However, we don’t want to see an empty screen during the calculations, so it’s nicer to show some random boxes at the start:
function recreateInstancedMesh(cnt) {

    // remove the old mesh and voxels data
    voxels = [];
    mainScene.remove(instancedMesh);

    // re-initiate the voxel array with random colors and positions
    for (let i = 0; i < cnt; i++) {
        const randomCoordinate = () => {
            let v = (Math.random() - .5);
            v -= (v % params.gridSize);
            return v;
        }
        voxels.push({
            position: new THREE.Vector3(randomCoordinate(), randomCoordinate(), randomCoordinate()),
            color: new THREE.Color().setHSL(Math.random(), .8, .8)
        })
    }

    // create a new instanced mesh object
    instancedMesh = new THREE.InstancedMesh(voxelGeometry, voxelMaterial, cnt);
    instancedMesh.castShadow = true;
    instancedMesh.receiveShadow = true;

    // assign voxels data to the instanced mesh
    for (let i = 0; i < cnt; i++) {
        instancedMesh.setColorAt(i, voxels[i].color);
        dummy.position.copy(voxels[i].position);
        dummy.updateMatrix();
        instancedMesh.setMatrixAt(i, dummy.matrix);
    }
    instancedMesh.instanceMatrix.needsUpdate = true;
    instancedMesh.instanceColor.needsUpdate = true;

    // add a new mesh to the scene
    mainScene.add(instancedMesh);
}
Animation
Now that all the models are ready, we have everything we need for animation:
instancedMesh: a mesh that every model fits in (the number of instances is equal to the biggest possible number of voxels).voxelsPerModel: array that holds colors and positions for each modelvoxels: array that holds current colors and positions of voxel boxes
To animate the voxels from one 3D model to another we use animateVoxels() function where all the position properties (.x, .y and .z) and all the color properties (.r, .g, and .b) get transitioned to new values. Thanks to the GSAP library, we can easily set delay, duration and easing function for each transition. On each frame of transition (onUpdate callback) we update the properties of all mesh instances, like we did before for static models. Then, we update the instanced mesh with new properties and make sure the right number of instances (instancedMesh.count) is visible at the end of the transition. I also found it nice to spin the model while transitioning.
function animateVoxels(oldModelIdx, newModelIdx) {

    // animate voxels data
    for (let i = 0; i < voxels.length; i++) {

        gsap.killTweensOf(voxels[i].color);
        gsap.killTweensOf(voxels[i].position);

        const duration = .6 + .6 * Math.pow(Math.random(), 6);
        let targetPos;

        // move to new position if we have one;
        // otherwise, move to a randomly selected existing position
        //
        // animate to new color if it's determined
        // otherwise, voxel will be just hidden by animation of instancedMesh.count

        if (voxelsPerModel[newModelIdx][i]) {
            targetPos = voxelsPerModel[newModelIdx][i].position;
            gsap.to(voxels[i].color, {
                delay: .7 * Math.random() * duration,
                duration: .05,
                r: voxelsPerModel[newModelIdx][i].color.r,
                g: voxelsPerModel[newModelIdx][i].color.g,
                b: voxelsPerModel[newModelIdx][i].color.b,
                ease: "power1.in",
                onUpdate: () => {
                    instancedMesh.setColorAt(i, voxels[i].color);
                }
            })
        } else {
            targetPos = voxelsPerModel[newModelIdx][Math.floor(voxelsPerModel[newModelIdx].length * Math.random())].position;
        }

        // move to new position if it's determined
        gsap.to(voxels[i].position, {
            delay: .2 * Math.random(),
            duration: duration,
            x: targetPos.x,
            y: targetPos.y,
            z: targetPos.z,
            ease: "back.out(3)",
            onUpdate: () => {
                dummy.position.copy(voxels[i].position);
                dummy.updateMatrix();
                instancedMesh.setMatrixAt(i, dummy.matrix);
            }
        });
    }

    // increase the model rotation during transition
    gsap.to(instancedMesh.rotation, {
        duration: 1.2,
        y: "+=" + 1.3 * Math.PI,
        ease: "power2.out"
    })

    // show the right number of voxels
    gsap.to(instancedMesh, {
        duration: .4,
        count: voxelsPerModel[newModelIdx].length
    })

    // update the instanced mesh accordingly to voxels data
    // (no need to call it per each voxel)
    gsap.to({}, {
        duration: 1.5, // max transition duration
        onUpdate: () => {
            instancedMesh.instanceColor.needsUpdate = true;
            instancedMesh.instanceMatrix.needsUpdate = true;
        }
    });
}
The rest is about UI. We register clicks on the previews to animate into a selected model. By clicking elsewhere on the screen we animate the voxels to the next model. To manage the clicks we use the combination of mouseup/mousedown events and mouse hold timeout instead of click event. It helps to avoid collisions between model selection and orbit controls events. You can find the full code in the repo.
And that’s a wrap! Thanks for reading and hope you’ve got some inspiration today ^^


