From our sponsor: Leverage AI for dynamic, custom website builds with ease.
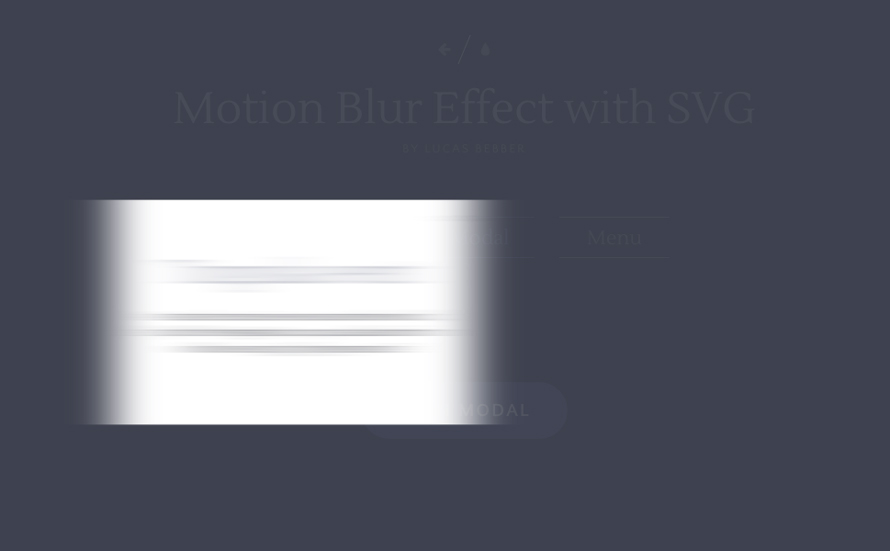
Today we are going to show you how to make a motion blur effect and apply it to regular JS or CSS animations of HTML elements.
Motion blur is a technique widely used in motion graphics and animation in general to make movement seem more smooth and natural.
Motion blur is the apparent streaking of rapidly moving objects in a still image or a sequence of images such as a movie or animation. It results when the image being recorded changes during the recording of a single frame, either due to rapid movement or long exposure.
In this article, we’ll take a look at how to make an approximation of that effect, for horizontal or vertical transitions.
In order to apply a motion blur effect to an animation, we need to apply a directional blur to the object according to the speed and direction it is moving, for every frame.
Let’s take a look at the steps we need to take to understand how the effect works:
Setting the blur
Since the regular CSS blur filter does not support directional blur, we are going to have to use SVG filters.
We’ve already covered the basics of SVG filters in the Creative Gooey Effects article.
For this effect, we will only be using the feGaussianBlur filter primitive.
<svg xmlns="http://www.w3.org/2000/svg" version="1.1" class="filters">
	<defs>
		<filter id="blur">
			<feGaussianBlur in="SourceGraphic" stdDeviation="0,0" />
		</filter>
	</defs>
</svg>
The stdDeviation attribute is used to set the blur intensity, and can take up to two parameters, for blur in the horizontal and vertical orientation.
Applying the filter to an element, as we’ve seen before, is simple enough:
.selector{
	-webkit-filter: url("#blur");
	filter: url("../index.html#blur");
}
For the motion blur effect, however, we are going to have to update the filter dynamically for every frame through JS.
First we will have to select and store the filter in a variable so that we can access it later. Since jQuery doesn’t play well with SVG elements, we need to select the element using native JS functions:
var filters = document.querySelector(".filters"), // the SVG that contains the filters
	defs = filters.querySelector("defs"), // the <defs> element inside the SVG
	blur = defs.querySelector("#blur"), // the blur filter
	blurFilter = blur.firstElementChild; // the feGaussianBlur primitive
</defs>
Setting the intensity then, is just a matter of changing the stdDeviation attribute of the filter primitive. For example, to set a horizontal 12px blur:
blurFilter.setAttribute("stdDeviation","12,0");
Keep in mind that this blur filter only supports directional blur on either the X or the Y direction, and not on any arbitrary angle, so you should plan your animations accordingly.
Note though, that changing the blur filter affects all objects linked to it, so we need a new <filter> element for each object we want to apply this effect to. Here is a simple way of creating these filters dynamically:
// go through all the objects that need a blur filter
$(".js-blur").each(function(i){
	// clone the filter
	var blurClone=blur.cloneNode(true);

	// create and set a new ID so we can use the filter through CSS
	var blurId="blur"+i;
	blurClone.setAttribute("id",blurId);

	defs.appendChild(blurClone);

	// set the CSS
	var filter="url(#"+blurId+")";
	$(this)
		.css({
			webkitFilter:filter,
			filter:filter
		})
		// store the filter reference on the object for practicity
		.data("blur",blurClone)
	;
});
Measuring the speed
For the next step, we need to be able to calculate, how far the object has moved since the last frame. We need to do this for every frame. The method for achieving this might vary according to how everything is set up; how the animation is done, etc. In this tutorial, we’ll take a more generalist approach, which, while it might not be optimized for all use cases, should work with most JS and CSS animations.
To get the position, we’ll be using jQuery’s offset function, which is just what we need: it returns the element’s coordinates relative to the document (rather than its parent), and takes the transform property into account.
To be able to check for changes and update every frame, we’ll use requestAnimationFrame.
Here’s an example:
// the element we want to apply the effect
var $element=$(".selector");
// storing the last position, to be able to measure changes
var lastPos=$element.offset();
// a multiplier, to be able to control the intensity of the effect
var multiplier=0.25;

// a helper to simplify setting the blur.
function setBlur(x,y){
	blurFilter.setAttribute("stdDeviation",x+","+y);
}

(function updateMotionBlur(){
	// get the current position of the element
	var currentPos=$element.offset();

	// calculate the changes from the last frame and apply the multiplier
	var xDiff=Math.abs(currentPos.left-lastPos.left)*multiplier;
	var yDiff=Math.abs(currentPos.top-lastPos.top)*multiplier;

	// set the blur
	setBlur(xDiff,yDiff);

	// store current position for the next frame
	lastPos=currentPos;

	// call to update in the next frame
	requestAnimationFrame(updateMotionBlur);
})();
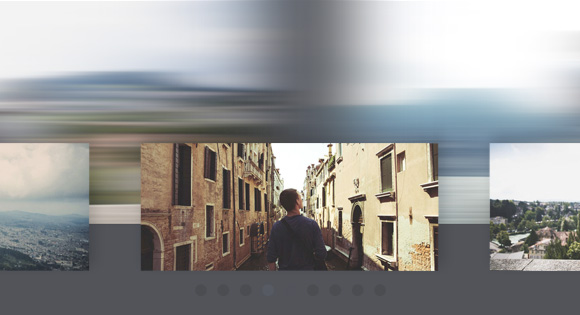
And here is the result:
This is the basic approach which takes only one element into consideration. A more complicated use might require code optimized for it in particular. For a more sophisticated take, you may look into applying the motion blur effect to multiple objects, disabling the blur and the speed calculation when there’s no animation, and so on.
And we’re done here! Again, with all things filter, please be aware that this effect can be resource intensive, so you should refrain from using it on large objects.


On a new MacBook Pro Retina running the newest Chrome Browser it’s not even close to smooth. Maybe the code should be optimized to use less performance.
On a 6 year old Macbook Pro everything runs silky smooth. Maybe you should optimize your “new Macbook Pro Retina”.
Hi! Sorry to hear that.
The problem is that since Retina screens have twice the regular resolution, there are 4 times as many pixels to calculate, and as such the effect gets much heavier.
Please keep in mind that this effect is only an experiment for now though. There’s currently no way to address that as far as I know, but there might be in the future when custom filters get wider support.
On 2013 MBP Retina 13″, the demo looks very smooth, oh with the latest chrome.
On my latest MBP 15” the gallery demo works just fine, but the others don’t. For the reason that the author mentioned. It is still a cool concept.
I’ve tried demo from laptop and mobile (Android). The demo (especially the third one) isn’t smooth even from laptop.
Browser – Chrome.
With jQuery :/
Awesome!!!
On my work iMac this is smooth, on my rMBP only the slider is. Here is a screenshot of how the modal ended up
The human eyes do motion blur all on their own. There’s no need to over-dramatize that effect. In this particular case, it’s not such a bother, but I fear there will be picture galleries out there, in time, with the motion blur effect exaggerated, making its visitors dizzy and nauseous.
This is a particular problem in modern 3D games, that add motion blur when your eyes do it perfectly fine.
To anyone aiming to implement this: please don’t. And if you absolutely must: keep it subtle.
I come from the motion graphics industry and hearing about this filter is exciting news. You make a good point about making visitors dizzy however motion blur done right is a powerful tool and can really make a difference in an animation. These demo’s for example seem a lot more fluid to me.
It would be great to see a comparison so we can clearly see the difference.
I am epileptic and this effect makes me lightheaded and very dizzy :/.
I too have a new Retina and can see the sort of hiccups with the effect…however, the article states clearly that this is experimental, so I’m in complete support of this exploration 🙂 Keep tinkering with filters and passing on your findings to us Lucas!
One interesting thing this brings to mind, is, if you’re in a situation where you want to manipulate SVG via JavaScript, but don’t want to add any libs >10kb, you end up having to hand code JS. I suppose for browsers that support SVG the “SVG-DOM API” will be similar enough, but it seems like there’s a space for a sort of zepto-like lightweight library for such cases (I guess Velocity might be ideal if you’re already using jQuery and just swap the animate modules).
Anyway, good stuff … keep it up!
In Chrome with the Menu demo if you open and close the slide-out menu really quick the background will get stuck at an angle. It looks kinda cool like that.
The menu animation is absolutely gorgeous.
in safari 8 not work =(
Woow. Amazing!!
So greet.i love codrops very much!~
This type of demo may be well suited for html-gl
It basically turns content into a bitmap and pushes to the GPU. From there, shaders can be used which are very fast. The cost is high up front, but the animation extremely efficient and smooth. This is actually good – humans have slow reactions, but are very sensitive to movement.
Do you know what browsers support this slider?
Oh! simply stunning idea.
Hi!, i am trying this nice effects, no problems on desktop devices but, what about mobile devices? the performance on mobile devices is very slow.
…in the menu demo, if the menu toggle is clicked too fast the menu reveals at an angle. this is a great look! i played around with the easing and Expo looks really smooth — not really a fan of Elastic.
i’d love to see this incorporated with Mary Lou’s off canvas sidebar transitions. how can i hack these together? any ideas? 😉
great work!
Thank you very much.
wow !!! thanks for this helpful code sir !!!
A really great tutorial. Will be using this SVG effect in my next project. Thanks A Lot For The Tutorial
I try to implement as a section in my project. But it takes up width in including all the images. ie., normally, the width of the gallery must be less than or equal to VW but it takes up like 8931 px ( size exceeds screen width ie., the width of gallery div tag is equal to the width of all images side by side ). Hope you get it.
Awaiting for your reply
Hi man, I am trying to use your motion blur onto more DIVs with one class but it simply doesn’t work..well, it does, but only on the first one appearance of that class…how to apply this motion blur onto all of them? (for example go to http://getpuppy.webak.sk/ and hover over the images of the dogs – the first one violet section is blurred, but the other ones are not)
Can this be applied to an entire webpage to give it motion blur as it scrolls?
Hey, Lucas. The menu example is not working on my Firefox Dev 50.
How you make nice carousel.Can I know?