Free course recommendation: Master JavaScript animation with GSAP through 34 free video lessons, step-by-step projects, and hands-on demos. Enroll now →
In this tutorial we will cover how to create an audio reactive shader using Three.js and Shader Park. Prerequisites include a basic understanding of Three.js, but no prior knowledge of Shader Park or shaders is required.
Watch the video tutorial and follow along!
You can see the demo here.
Shader Park is a JavaScript library for creating interactive procedural 2D and 3D shaders that allows you to explore shader programming through a JavaScript interface without the complexity of GLSL. The language is inspired by P5.js and currently supports plugins for Three.js, Hydra, and TouchDesigner. Documentation on the Shader Park library can be found here. There’re a number of getting started tutorial videos you can find here that are very helpful to explore before diving into this tutorial.
Getting Started
You can follow along with the YouTube tutorial and this tutorial by using the Starter Template. There’s also a Completed Project that we’ll be working towards which you can also use to make any shader from Shader Park audio reactive. If you have any questions please feel free to reach out on the Shader Park Discord. Shader Park documentation can be found here.
Start by making an account on Glitch.com, open up the starter template, and hit the Remix button in the top right of the page so you can start following along.

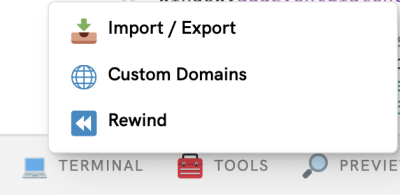
You can also download the project and edit in the coding editor of your choice by going to Tools / Import Export and Download Project.
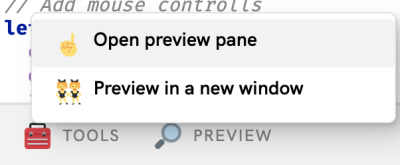
If you don’t already have the preview window open on Glitch you can click the Preview button and Open Preview Pane
Project Overview

Let’s start with the script.js file.
Notice in the start template we have a basic scene in Three.js set up for you already. This includes a Scene, Camera, Renderer, and Orbit Controls, as well as a Sphere Geometry with a material applied to it.
For this tutorial, we’re going to create our own custom material with Shader Park, set up our audio-reactivity, and combine them together.
First we’ll swap out material and mesh for the sphere Geometry with one generated by Shader Park. Notice at the top of the starter template we’re already importing the createSculptureWithGeometry function from shader-park-core.
import { createSculptureWithGeometry } from 'https://unpkg.com/shader-park-core/dist/shader-park-core.esm.js';Let’s remove the existing material and mesh. Comment out lines 35 and 36 and let’s uncomment 38-45 to create our shader (shown below).
createSculptureWithGeometry takes the following parameters:
- a geometry from three.js (this can be any geometry
- your shader park code as a string (this is JavaScript, but it gets converted into GLSL, a programming language that will run on your computer’s graphics card)
- a callback function that returns a dictionary of uniforms (we’ll cover these shortly, but for now think of them as inputs to your shader that we can update externally using JavaScript)
// let material = new MeshBasicMaterial( { color: 0x33aaee} );
// let mesh = new Mesh(geometry, material);

let mesh = createSculptureWithGeometry(geometry, spCode(), () => {
  return {
    time: state.time,
    // pointerDown: state.pointerDown,
    mouse: state.mouse,
    // audio: state.audio,
  }
})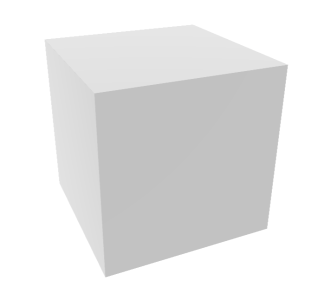
Notice that we get a 3D cube now, but where did our sphere geometry go?
Navigate to sp-code.js (this is where we put our Shader Park code) and you’ll see the definition for our box. Try scaling up the box to around 1.5.
export function spCode() {
  return `
      box(vec3(1.5));
  `;
}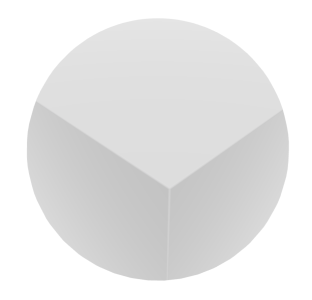
Okay, so the sphere is back and if you click in the preview pane and drag the sphere around you can start to see the edges of our box. So what’s going on here?
We’re still using our Sphere Geometry as a bounding box, but now Shader Park has generated a material for us behind the scenes and applied it to the geometry. What’s really exciting is that we’re able to simulate a 3D shader inside the material and this gives us some really interesting techniques to play around with that we’ll get into shortly.
Adding Inputs / Uniforms to our Shader
By default, the mouse position and time are not accessible within the shader. To make them available, we need to pass them in. When working with Shader Park’s built-in web editor, the setup is done automatically, but in the Three.js code, we need to manually add the inputs (normally referred to as uniforms in shaders) within the createSculptureWithGeometry callback. We will use a uniform called “audio” later on to pass the audio analysis from three.js into our shader.
Let’s test it creating an input / uniform by adding an input in the sp-code.js file called “size” and let’s use it to change the size of the box:
export function spCode() {
  return `
      let size = input();
      box(vec3(size));
  `;
}
Next, in our script.js file, we need to add a uniform called “size” and pass in a value for the size. It’s important to note that the name can be anything we choose, but it must match in both the Shader Park code and the createSculptureWithGeometry callback function.
let mesh = createSculptureWithGeometry(geometry, spCode(), () => {
  return {
    time: state.time,
    size: .5,
    // pointerDown: state.pointerDown,
    mouse: state.mouse,
    // audio: state.audio,
  }
})
Note that there’s also a state object that you can use to store your variables similar to how we’re using time. Notice state.time.
Go ahead and remove the size uniform from our Shader Park code and createSculptureWithGeometry. Let’s add click events by using the pointerDown event. Go ahead and uncomment the pointer down from createSculptureWithGeometry on line 41 and also in the state object on line 26 as well as currPointerdown on line 27.
We’ll need to define this in our sp-code.js. Try using it as the size of the box.
export function spCode() {
  return `
      let pointerDown = input();
      box(vec3(pointerDown));
  `;
}
Now when you click on the preview pane you’ll see the size of the box changing. Notice that the code to handle the pointer down event is defined on lines 54, 55, and there’s also easing / linear interpolation being applied in the render loop on line 77. You could also do something similar if you wanted to create a shader that would respond to the page scroll event. Next up let’s add in our audio reactivity.
Adding Audio Reactivity
Take a look at the documentation on the Three.js website for the Audio Analyzer. We’ll be adding this to our project, but instead of using a globally defined THREE, we’ll just import all the individual components from Three.js so our website is lighter. Make sure to take a look at the getFrequencyData function which we’ll be using to get out the low notes from our audio.
We’ll also setup an audio loading button that you can press to play the audio, since you need a physical action to start audio on mobile.
// create an Audio source
const sound = new Audio( listener );

let button = document.querySelector('.button');
button.innerHTML = "Loading Audio..."
// Notice that we removed display none

// load a sound and set it as the Audio object's buffer
const audioLoader = new AudioLoader();
audioLoader.load( 'https://cdn.glitch.global/59b80ec2-4e5b-4b54-b910-f3441cac0fd6/OP1Beat.wav?v=1667175863547', function( buffer ) {
  sound.setBuffer( buffer );
  sound.setLoop(true);
  sound.setVolume(0.5);
  button.innerHTML = "Play Audio"
  button.addEventListener('pointerdown', () => {
    sound.play();
    button.style.display = 'none';
  }, false);
});

// create an AudioAnalyser, passing in the sound and desired fftSize
// get the average frequency of the sound
const analyser = new AudioAnalyser( sound, 32 );
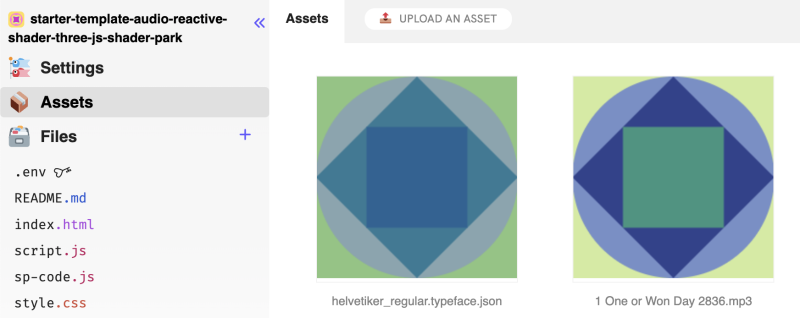
To add an audio file to Glitch go to assets, then drag and drop a song. After it has been uploaded click on the asset and you’ll get a URL to the media. You can replace the existing URL that’s the first parameter to audioLoader.load().
Go ahead and uncomment the audio and currAudio from the state on lines 28, and 29 and from createSculptureWithGeometry on lines 41 and 43. we’ll use these to keep track of… you guessed it… our audio :). We’ll use audio from the previous frame to add easing / linear interpolation so our visuals look smooth and buttery.
Next, we need to get the audio analysis, so we can add the following to our render loop on line 78:
if(analyser) {
  state.currAudio += Math.pow((analyser.getFrequencyData()[2] / 255) * .81, 8) + clock.getDelta() * .5;
  state.audio = .2 * state.currAudio + .8 * state.audio;
}
The getFrequencyData()[2] will give us back data from the 2nd bin of the audio analysis which represents the low notes. Values are from 0-255, so we divide by 255 to normalize them from 0-1. Then we scale the values down a little bit and raise them to a power of 8. Raising the audio analysis to a power makes it so a more dramatic change in the audio is needed to cause the output value to reach close to 1, for example when a kick drum hits. This looked good for my song, but might need tweaking for your own, so make sure to play around with these values. Next, we add in clock.getDelta().*5 so that we always have a little motion even if the audio isn’t playing.
On the 2nd line of code, we set the actual audio variable that we’ll pass along to the shader using linear interpolation, so we’re getting 20% of the current audio and 80% of the previous frame’s audio. This adds some nice smoothing. Also notice that we’re += the state.currAudio so it will continuously count up. This value will only work well in an animation where we’d usually use time in our Shader Park code.
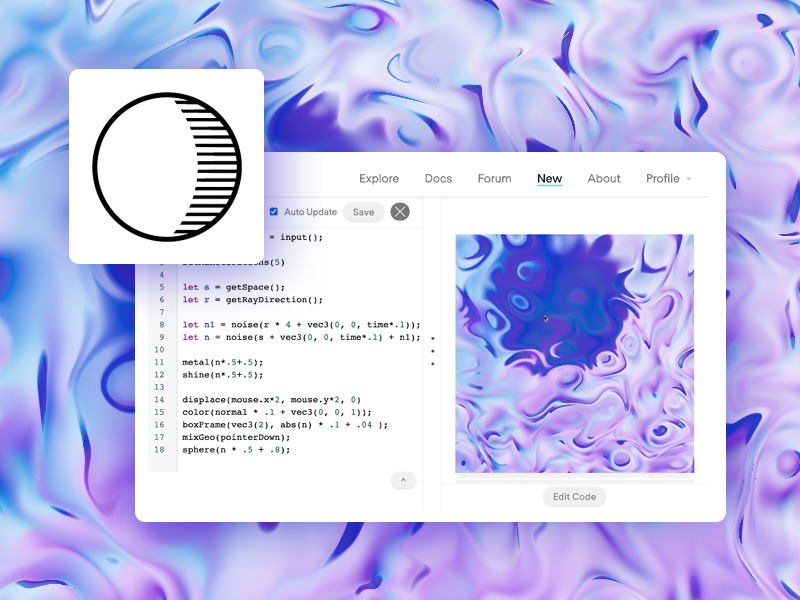
Creating our Shader in Shader Park
Head over to Shader Park’s built in Web Editor. If you haven’t created an account already you can quickly sign up for an account so you can save your project.
Again, I highly recommend you check out the getting started tutorials on Shader Park so you can familiarize yourself with the language. You can find the video tutorial series here.
Let’s start by adding a boxFrame and a sphere and mixing between the geometry with an input. By default, we’re in a union mode with geometry where you can add anything to the scene, but here we can use mixGeo to easily blend between two geometries. We’re using an input / uniform called pointerDown so later on, when we bring it into the website we can use our click events.
Next, we can add color. The color values range from 0 to 1 in an RGB format. There’s also a HSV helper if you’d like as well. Here we’re using a base color of blue and adding a small amount of the normal of the 3D object to have some variety in the color.
To create the ripple effect we need to use noise, which can generate random values for us that are continuous and smooth. This can create things like the look of mountains or the surface of water.
The noise needs a position in space to sample. So we’ll use getSpace(). If you come from a shader programming background this is our fragCoord with a z value attached to it, so you get back an xyz position.
We can use our noise function to color our shape as well as displace our shape.
Notice that we’re adding a vec3 to s. This allows us to translate where we’re sampling the noise function. In this case we’re translating in the z direction with a small amount of time so the motion feels random. We’re also adding our noise n to the size of our sphere and scaling it down. Note that you can use the noise function in to color and displace your object.
We can also sample our noise with the ray direction, which gives us the angle that the camera is pointing toward the object.
Let’s make another noise variable called n1 and sample noise using getRayDirection(). Also, change the size of your sphere to use n1 instead of n.
A really cool technique is to take the coordinate from one noise and pass it into the position of another.
Let’s take n1 and pass it into the position for n. Let’s change the sphere’s size back to using n instead of n1.
Next, we’ll scale up our boxFrame size, displace our coordinate space with the mouse so it’ll respond to mouse movement, and add in some nice lighting with metal and shine.
Then we can turn down the number of iterations the underlying ray marching engine is using. The technique of ray marching is what allows us to create a 3D shader, by lowering the iterations down to 5 we get something closer to a 2D shader. This also has a performance improvement.
Lastly, we’ll create an input for audio and replace the variable time with audio throughout our shader.

The last step is to bring that code back into our project. You can copy the Shader Park code and put it into sp-code.js:
export function spCode() {
  return `
      let pointerDown = input();
      let audio = input()

      setMaxIterations(5)

      let s = getSpace();
      let r = getRayDirection();

      let n1 = noise(r * 4 + vec3(0, 0, audio*.1));
      let n = noise(s + vec3(0, 0, audio*.1) + n1);

      metal(n*.5+.5);
      shine(n*.5+.5);

      displace(mouse.x*2, mouse.y*2, 0)
      color(normal * .1 + vec3(0, 0, 1));
      boxFrame(vec3(2), abs(n) * .1 + .04 );
      mixGeo(pointerDown);
      sphere(n * .5 + .8);
  `;
}
And that’s it!
I hope you enjoyed this tutorial. I’m really excited to see what you create using this!


