Free course recommendation: Master JavaScript animation with GSAP through 34 free video lessons, step-by-step projects, and hands-on demos. Enroll now →
This is the third in a series of articles exploring SVG filters and some effects made possible through them. The first article introduced us to SVG filters, what they are, how they work, and how to create and use them. The second article explored the creation of paint-like image effects as well as text outlines using the <feMorphology> filter primitive.
This article is part of a series on SVG Filter effects. Check out the other articles in the series:
- SVG Filters 101
- Outline Text with <feMorphology>
- Poster Image Effect with <feComponentTransfer> (this article)
- Duotone Images with <feComponentTransfer>
- Conforming Text to Surface Texture with <feDisplacementMap>
- Creating Texture with <feTurbulence>
- SVG Filter Effects: Moving Forward
This article assumes that you’re already familiar with the basics of SVG filters, or that you’ve read the first (SVG Filters 101) article in this series. If you haven’t, please feel free to take a few minutes to read it.
The feComponentTransfer is one of SVG’s most powerful filter primitives. It gives us control over the individual RGBA channels of our source graphic, enabling us to create Photoshop-like effects in SVG. In this article, which is the first article focusing on feComponentTransfer, we’ll get to know this primitive and see how it can be used to posterize images.
Posterization or posterisation of an image entails conversion of a continuous gradation of tone to several regions of fewer tones, with abrupt changes from one tone to another. This was originally done with photographic processes to create posters. — Wikipedia
Posterization occurs across an image but is most obvious in areas of subtle variation in tone.

In this article, we’ll use feComponentTransfer to reduce the number of colors in an image, which, in turn, will result in the creation of a nice poster effect similar to what we see in commercial or graphic design posters.
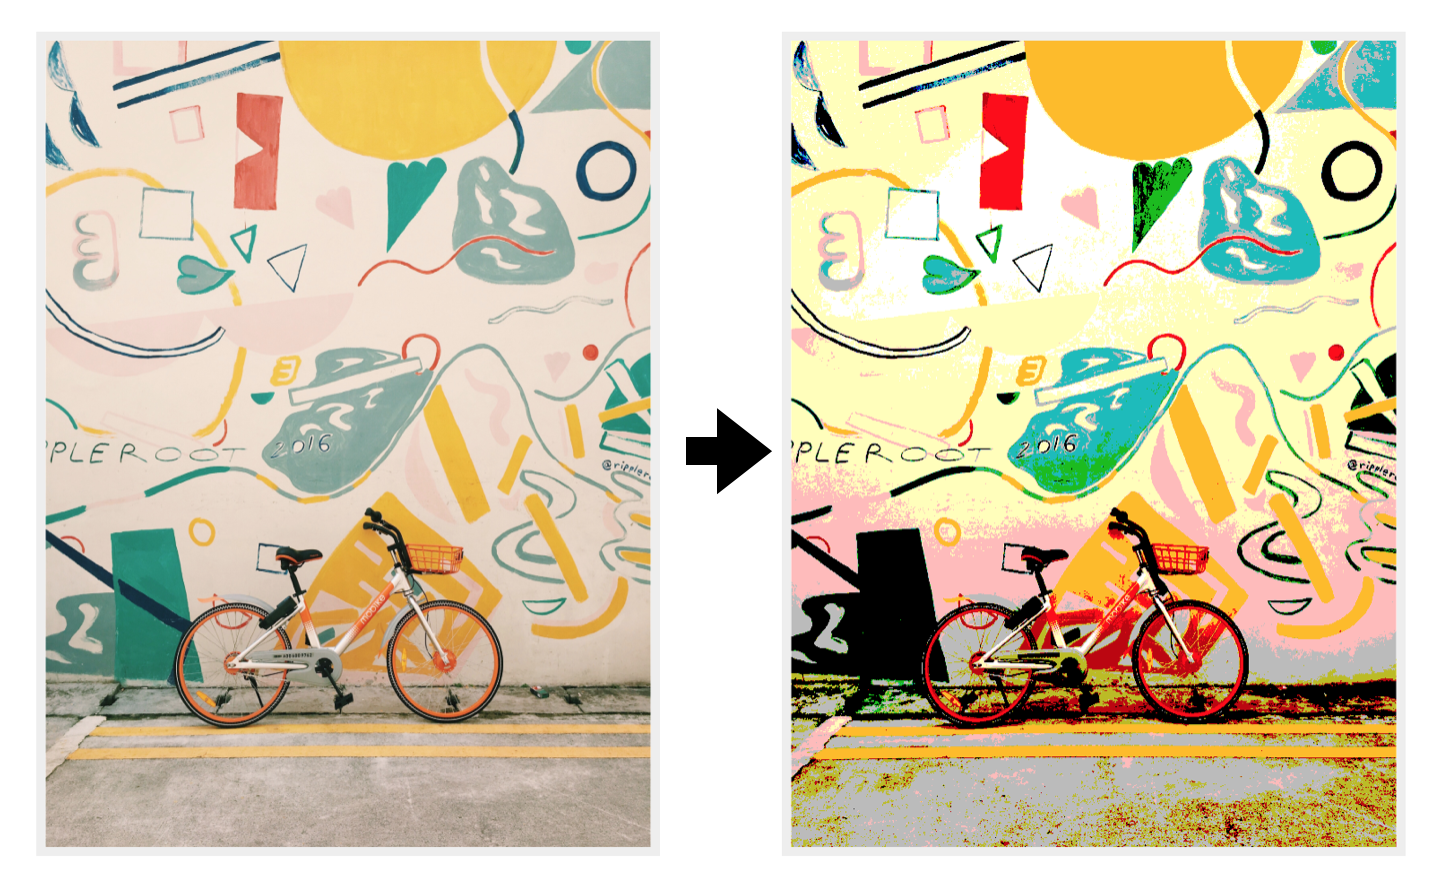
feComponentTransfer reduces the number of colors in that image (right).But first, let’s cover the technical basics…
Quick Overview of feComponentTransfer
The fe<strong>Component</strong>Transfer primitive allows you to modify each of the R, G, B and A components present in a pixel. In other words, feComponentTransfer allows the independent manipulation of each color channel, as well as the alpha channel, in the input graphic. It allows operations like brightness adjustment, contrast adjustment, color balance or thresholding.
The RGBA components are modified by running transfer functions on these components. To do that, each component has its own element, referred to as Transfer Function Element. I will be referring to these elements as “component elements” throughout this article — elements that refer to individual RGBA components. These elements are nested within feComponentTransfer. So the feComponentTransfer does nothing aside from housing the individual RGBA component elements. The RGBA component elements are: feFuncR, feFuncG, feFuncB, and feFuncA.
The type attribute is used on a component element to define the type of function you want to use to modify this component. There are currently five available function types: identity, table, discrete, linear, and gamma. These function types are used to modify the R/G/B/A components of a source graphic. We will cover most of these and see how they can be used in this series.
<feComponentTransfer>
    <!-- The RED component -->
    <feFuncR type="identity | table | discrete | linear | gamma"></feFuncR>

    <!-- The GREEN component -->
    <feFuncG type="identity | table | discrete | linear | gamma"></feFuncG>

    <!-- The BLUE component -->
    <feFuncB type="identity | table | discrete | linear | gamma"></feFuncB>

    <!-- The ALPHA component -->
    <feFuncA type="identity | table | discrete | linear | gamma"></feFuncA>
</feComponentTransfer>">
For each function type, one or more attributes exist that allow you to specify more details of, and for, the function used. For example, the linear function has a slope attribute that is used to specify the slope of the linear function that will be used to modify the component it is applied to.
You can modify one or more component at a time. This means that the feComponentTransfer may contain one, two, three, or all of the component elements at a time. You can also modify channels independently, applying a different function to each component element.
The ability to use different functions on different component elements means that you have very large control over the colors of your source graphic on the lowest pixel level. You may choose to modify the red and blue channels by mapping them to two new colors while keeping the green unchanged or only increasing its intensity, for example. This low-level component control means that you will be able to apply Photoshop-grade functions to your images in the browser using a few lines of code. I don’t know about you but the (wannabe-)designer in me thinks this is super exciting!
Example: Using the Alpha component to reduce the opacity of an object
A simple real-life example is using the feFuncA component element to reduce the transparency of a source graphic. In the first article in this series, we saw how we can use feColorMatrix to reduce the opacity of an element by changing the value of the alpha channel in a color matrix. I personally prefer using feComponentTransfer for this singular operation.
Applied to a source, the following filter reduces the opacity of that source to 0.5:
<filter id="redOp">
    <feComponentTransfer>
        <feFuncA type="table" tableValues="0 0.5"></feFuncA>
    </feComponentTransfer>
</filter>
We mentioned above that we have five different functions that we can use to manipulate the RGBA components. The table function type works by mapping the values of the component (which is the alpha channel in our example) to a series of values provided in the tableValues attribute.
So, what does that mean?
The alpha channel of an element usually lies in the range [0, 1]. By using the table function and providing two values: 0 and 0.5, we’re essentially telling the browser to map the [0, 1] alpha range to a new range: [0, 0.5]. By doing so, the opacity is reduced to half.
See the Pen feMorphology on an image by Sara Soueidan (@SaraSoueidan) on CodePen.
We’ll go into a more detailed example of the table function in the next article. In this article, I want to shed the light on the discrete function type. So, let’s see how it works and what we can do with it.
Poster Image Effect: Reducing the number of colors in an image with the discrete function
The discrete function is used to decrease the number of colors in an image (or in a component if used on only one component). Reducing the number of colors in an image means that, instead of smooth, linear gradient color changes, you will see more sudden color shifts, which make the image look like it is made of bands or clusters of color, thus resulting in a poster-like effect.
discrete function used to reduce the number of colors in it to only 5 values per component. You can see how instead of smooth color changes (using gradients), the colors change suddenly, creating color bands and clusters, and the image looks more “posterized”.Personally, the discrete function reminds me of the steps() timing function in CSS. When compared to a linear function, a step-by-step function jumps from one value to another, instead of moving linearly between them.
Like the table function, the discrete function accepts a series of values provided in the tableValues attribute. The discrete function differs from table in the way it uses these values.
Using tableValues you provide the browser with a finite list of values that you want it to map a color component to. And since you are providing a finite list of values, you will end up with a finite number of colors, thus creating color bands and clusters, that would otherwise normally be linear gradient shifts of colors.
The function is defined by the step function given in the attribute tableValues, which provides a list of n values in order to identify a step function consisting of n steps.— The SVG Filters Specification
Let’s see what that means in plain English. Assume we have the following code snippet:
<svg width="500" height="335" viewBox="0 0 500 335">
    <filter id="posterize">
        <feComponentTransfer>
            <feFuncR type="discrete" tableValues="0 .5 1" />
        </feComponentTransfer>
    </filter>

    <image xlink:href="..."cwidth="100%" height="100%" x="0" y="0"
           filter="url(#posterize)"></image>
</svg>
In the above snippet, we are applying a discrete function to modify the Red color channel in our source image. We provide 3 discrete values that we want the browser to map the red color values to. In an SVG filter, component values are represented in fraction values in the range [0, 1]. This means that the Red component value in any pixel can be 0 (0% Red / fully black) or 1 (100% Red) or any value (shade of red) in between. This is the same for the Green, Blue and Alpha channels too.
For every n number of values you provide, the browser will create n ranges. More specifically, it will divide the [0, 1] into n ranges. Then it will map the color values that lie within those ranges to the n values you provided. Applying this logic to our snippet:
- The browser sees three discrete values for red in
tableValues; - It divides the red color values to three equal ranges within the [0, 1] range. So our three ranges look like this:
- [0, 0.33]
- [0.33, 0.66]
- [0.66, 1]
- Next, the browser checks the current value of red in each and every pixel in the image. For each pixel, it determines which range that red color value belongs in.
- Then, it maps that red value to the corresponding new value you provided. The mapping looks like this:
- Colors within the [0, 0.33] range are mapped to 0;
- Colors within the [0.33, 0.66] range are mapped to 0.5;
- Colors within the [0.66, 1] range are mapped to 1;
You can also think of this process as turning shades of color ON or OFF. When you provide discrete values for a color, you’re telling the browser that only these values will be ON, and if a pixel contains a value that is not equal to one of these three, it should be turned OFF and replaced by one of these three. So, for example, the 0.8 color value is considered OFF and will be replaced with 1 (because it lies in the third range).
The following is a hand-drawn illustration of this color mapping that I drew when I was wrapping my head around it. You might find it useful.

By the time the browser goes over all the pixels in the image, you will have replaced a large number of red values with a small number you’ve chosen in tableValues, thus replacing smooth color changes with sudden color changes, and the image looks like it’s made of clusters or bands of colors.
The following is a live demo of applying the above code snippet to an image with a lot of red in it. By limiting the number of Reds in the pixels of the image and zeroing the reds out in some of those pixels, the image shows an overall noticeable reduction in red, especially in the bottom area of the image:
See the Pen Image Posterization 2 by Sara Soueidan (@SaraSoueidan) on CodePen.
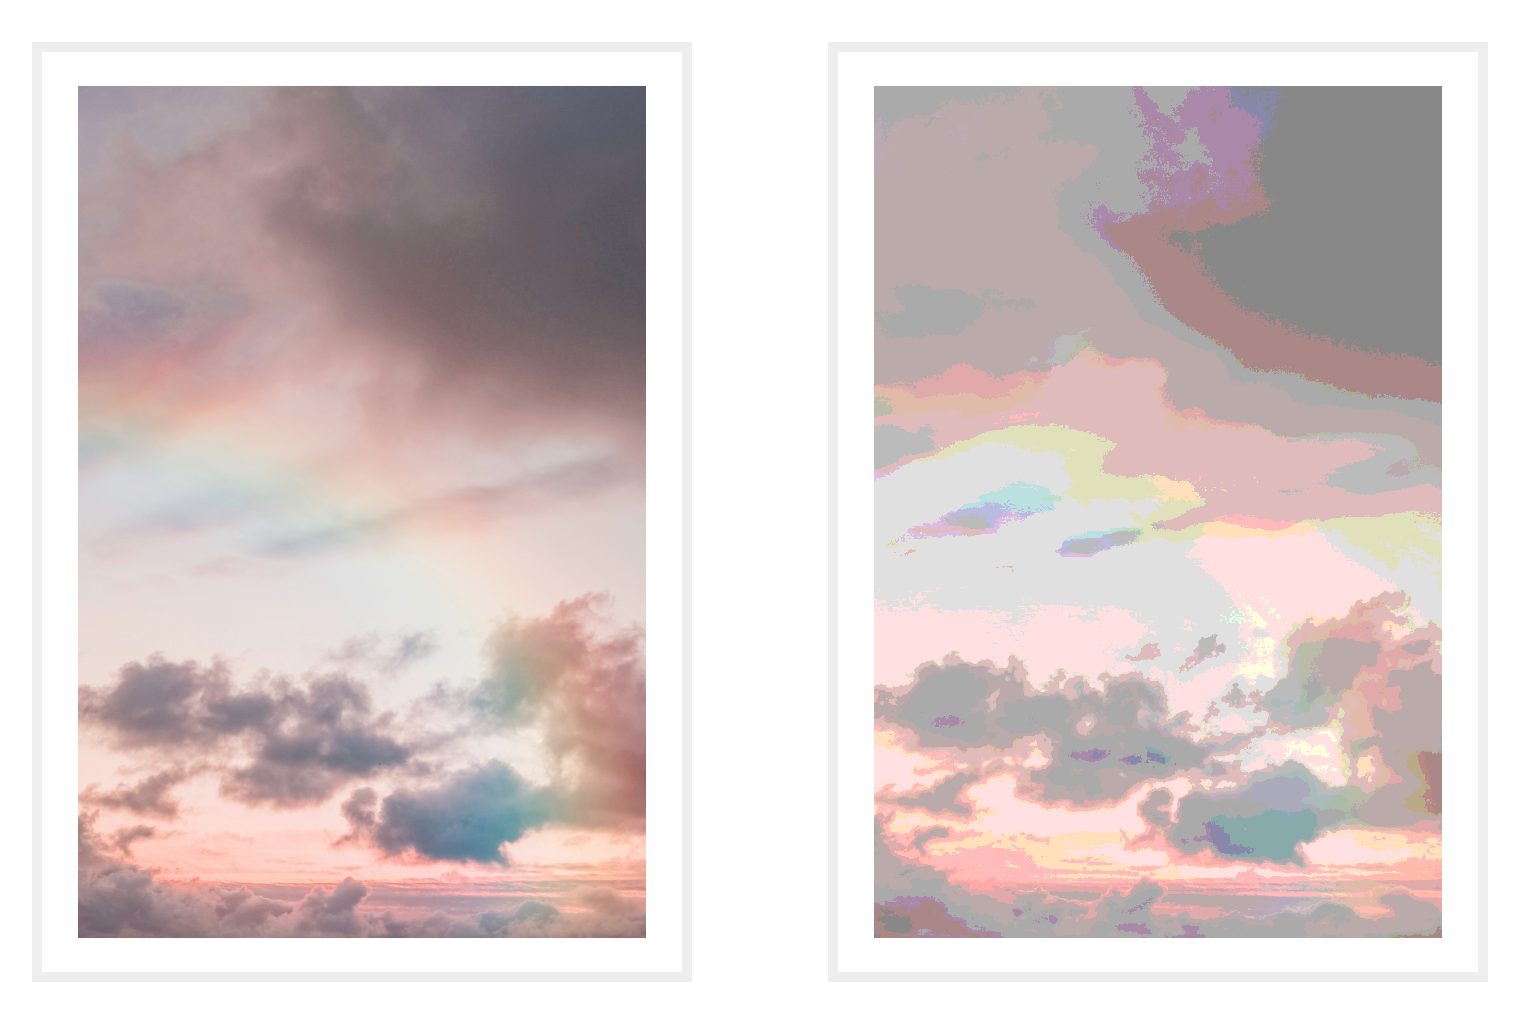
Changing the number of discrete values and/or changing the values themselves will change the overall result. You may want to avoid providing 0 as a value sometimes if you want to avoid having any black areas in an image. For example, if we were to revisit the sky image above, we probably don’t want to have any clusters or bands of black in the poster version of the image because it is still an image of a sky after all. We also want more than just two or three colors because having too few colors would make the image lose a lot of its visual affordance.
To create that effect, I limited the number of RGB colors to five, starting at 0.25 as the lowest value:
<filter id="posterize">
    <feComponentTransfer>
        <feFuncR type="discrete" tableValues=".25 .4 .5 .75 1" />
        <feFuncG type="discrete" tableValues=".25 .4 .5 .75 1" />
        <feFuncB type="discrete" tableValues=".25 .4 .5 .75 1" />
    </feComponentTransfer>
</filter>
You can play with the effect in the following live demo:
See the Pen Image Posterization by Sara Soueidan (@SaraSoueidan) on CodePen.
And that’s how you posterize images (or any other content, for that matter) using SVG filters.
Final Words
I hope this article has helped demystify feComponentTransfer a little and has shown you how powerful pixel- and component-level color control can be.
In the next article, we will look at two more powerful feComponentTransfer transfer function types. We’ll take a look at how we can mimic Photoshop’s duotone image effect, and how we can control the brightness, contrast, and intensity of colors within an image using feComponentTransfer. Stay tuned.


