From our sponsor: Leverage AI for dynamic, custom website builds with ease.
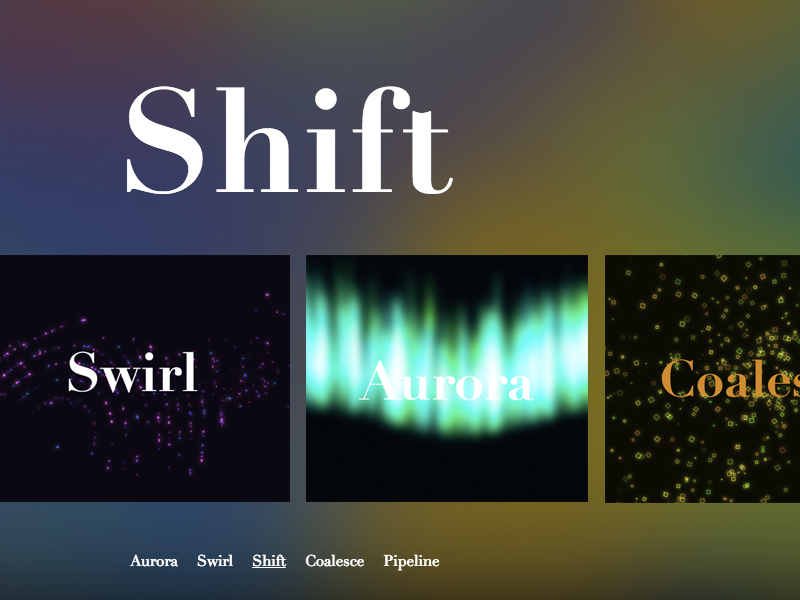
Today we’ll be exploring some ambient webpage background animations. The idea here was to create a collection of animations that are interesting to look at without being (too) distractive, and could be easily applied to the background of a webpage. Each animation is created using vanilla (es6+) JavaScript with the Canvas API, and 3 of 5 use Jonas Wagner’s Simplex Noise library.
There are a couple useful techniques I use in each demo to make things run more efficiently.
One is offscreen drawing or buffering. The idea is to have an in-memory canvas and context to handle all of the complex drawing, and an onscreen canvas to draw each new frame in the rendering loop. This technique also allows for re-drawing the same reference frame multiple times, which can be combined with filtering and compositing techniques to create some interesting effects.
Example:
  function render() {
    ctx.onscreen.drawImage(canvas.offscreen, 0, 0); // render offscreen canvas to onscreen
  }

  function draw() {
    ctx.offscreen.fillStyle = 'hsla(220,50%,50%,1)';
    ctx.offscreen.fillRect(0, 0, canvas.offscreen.width, canvas.offscreen.height); // fill offscreen canvas background

    // draw objects to offscreen canvas here

    render();
    window.requestAnimationFrame(draw);
  }
Another technique I use is to reduce all complex objects’ properties down into a single array.
For example, let’s say we want to draw a particle. A 2D particle tends to have the following basic properties:
- position (x, y)
- velocity (x, y)
- color
Rather than storing these values as object properties, we can store them in a single typed array, thereby eliminating the need for a large array of complex particle objects.
Example:
  const particleCount = 200;
  const propCount = 5; // x, y, vx, vy, hue (hsla color)
  const propsLength = particleCount * propCount; // length of the props array

  let props;

  function createParticles() {
    props = new Float32Array(propCount);

    // iterate for the length of the props array
    // increment by the number of props per particle
    for (let i = 0; i < propsLength; i += propCount) {
      createParticle(i);
    }
  }

  function createParticle(i) {
    let x, y, vx, vy, hue;

    // initialize values here, can randomize, use simplex noise or anything really :)

    props.set([x, y, vx, vy, hue], i);
}Demo #1: Aurora

The first step in creating this effect was setting up the rays. The basic idea was to place them randomly along the x-axis and centered along the y-axis, then offset by the simplex noise field value at each position and draw as a gradient.
To achieve the blur effect, I initially draw everything to an offscreen canvas as mentioned above, then I copy and blur the image, then render in the onscreen canvas.
Demo #2: Swirl
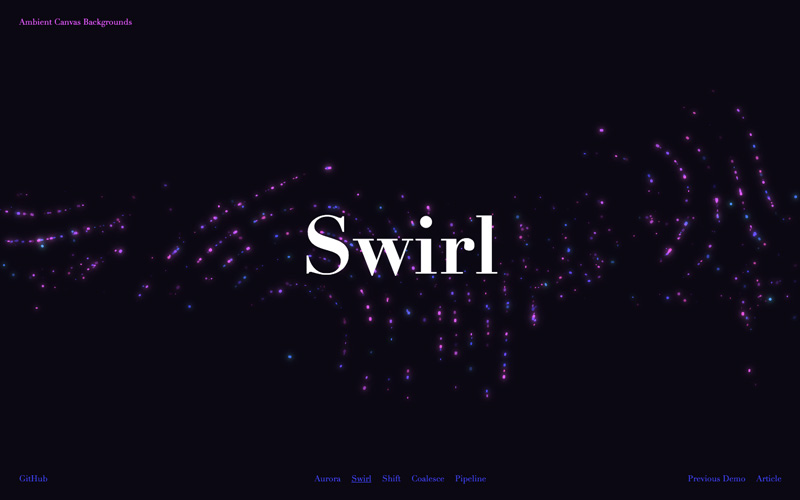
To create this effect I use the simplex noise library to determine the noise value at each particle’s position at the current time in the animation. I then multiply that value by tau, or 2 * pi to get an angle in radians. I multiply that value by the number of noise steps, in this case 8, and apply that final value to the particles’ velocity. Multiplying by a number of steps creates the “banding” look in the particle movement.
To achieve the glow effect, I use the same blur technique as in the aurora demo, and then I re-draw the reference (offscreen) canvas without a blur and composite the frame with the current onscreen canvas.
Demo #3: Shift
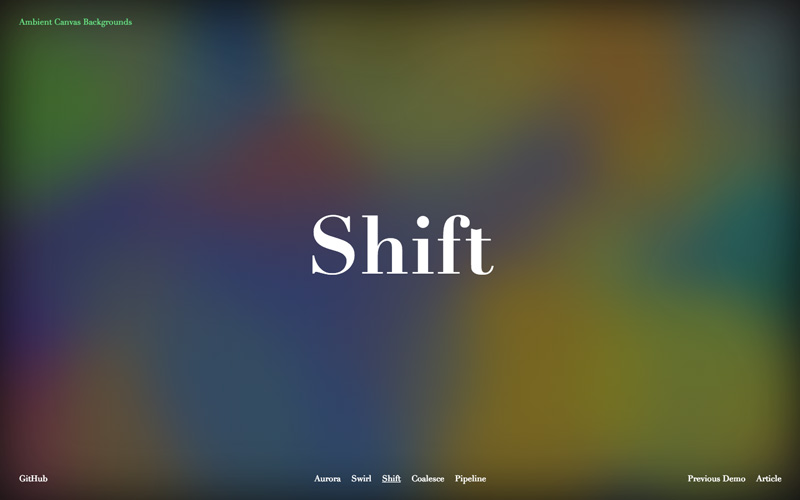
For this effect, I create a number of large circles and place them randomly on the screen. I move them along at random and update their color values using the current noise value at their position and time. Then I blur and draw the reference frame to the onscreen canvas.
Demo #4: Coalesce
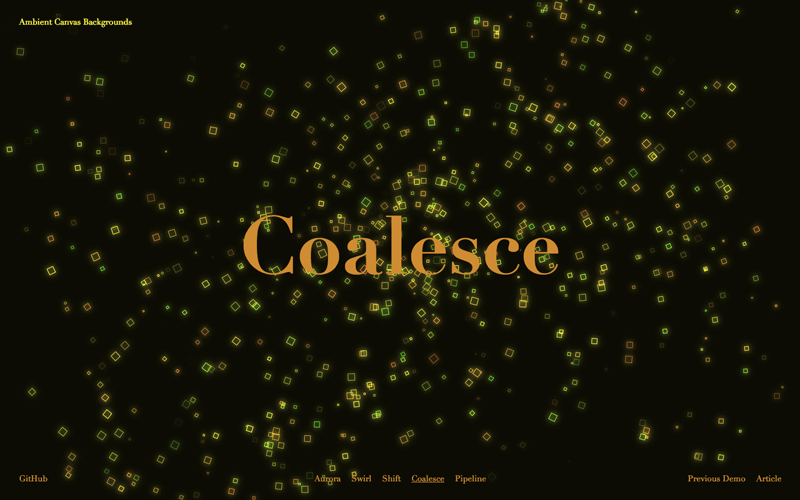
This effect uses the same technique for creating a glow effect as the swirl demo.
What I wanted to do here was to have each particle start out rushing for the center and then get caught in a spiral toward the center. To do this I store the direction value in my props array, then in my update loop I interpolate their direction from pointing directly at the center to pointing slightly off-center, also slowing the speed along the way.
To keep the squares from always facing the same direction, I used the .translate() and .rotate() functions to rotate each particle.
Demo #5: Pipeline
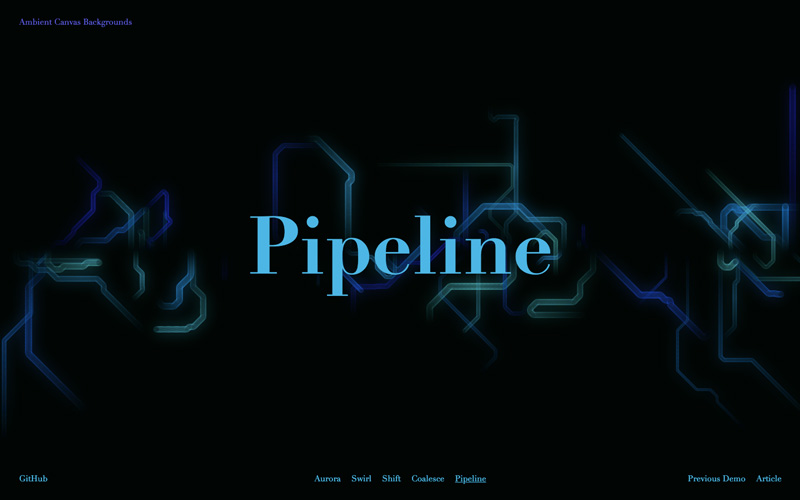
Although they may look like pipes, this is also a particle animation. Each particle is drawn only as a circle with a stroke, no fill and low opacity. They move along slowly and each previous frame is retained onscreen, which creates the look of pipes.
For the pipe turns, I setup an initial count for the number of possible turns, 8 for this animation. I get the value in radians of a single turn, and randomly decide for each pipe when to allow a turn and also decide if the turn should be negative or positive.
Browser Support:- ChromeSupported
- FirefoxSupported
- Internet ExplorerNot supported
- SafariNot supported
- OperaSupported