From our sponsor: Leverage AI for dynamic, custom website builds with ease.
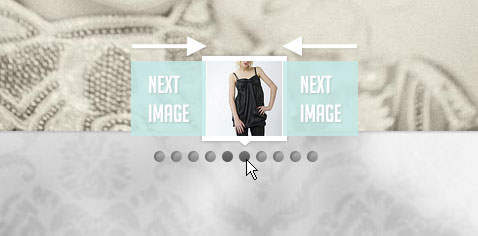
In this tutorial we will create an image gallery with jQuery that shows a preview of each image as a little thumbnail. The idea is to hover over the slider dots and make the regarding thumbnail slide into the previewer. When clicking a slider dot, the full image will slide in from the right or left side, depending on the currently viewed image.
Update: If you are interested in integrating the thumbnails preview slider you might want to check out the new post on how to use only the preview part:
Thumbnails Preview Slider with jQuery
The beautiful images are by talented geishaboy500 and can be found here on his Flickr Photostream.
So, let’s roll!
The Markup
The HTML structure is going to consist of a main container which will have the image wrapper for the big image, the navigation items and the dot list with the thumbnail preview:
<div id="ps_container" class="ps_container">
	<div class="ps_image_wrapper">
		<!-- First initial image -->
		<img src="images/1.jpg" alt="" />
	</div>
	<!-- Navigation items -->
	<div class="ps_next"></div>
	<div class="ps_prev"></div>
	<!-- Dot list with thumbnail preview -->
	<ul class="ps_nav">
		<li class="selected">
			<a href="images/1.jpg" rel="images/thumbs/1.jpg">Image 1</a>
		</li>
		<li>
			<a href="images/2.jpg" rel="images/thumbs/2.jpg">Image 2</a>
		</li>
		...
		<li class="ps_preview">
			<div class="ps_preview_wrapper">
				<!-- Thumbnail comes here -->
			</div>
			<!-- Little triangle -->
			<span></span>
		</li>
	</ul>
</div>
The thumbnail preview element will be a list item in the dot list. It’s going to have a special class since we want to treat this element differently. Each dot list item will contain a link element which will hold the information on the thumbnail image and the big image. Using JavaScript, we will extract that path information from the attributes and create the image elements dynamically.
Let’s take a look at the style.
The CSS
First, we will style the main container. Since our images have a maximum width of 680 pixel and a maximum height of 450 pixel, we will define the following values for the container (leaving some space for the dot list):
.ps_container{
	display:none;
	width:680px;
	height:500px;
	margin:20px auto 0px auto;
	position:relative;
}
Now we will style the wrapper for the full images. Here we really set the exact maximum dimensions and say that the overflow is hidden. We do that because we want to be able to put two images inside of this wrapper but cut off the overflow. In our JS function we will animate the images so that the current one gets revealed.
We will center the wrapper by setting the left and right margins to “auto”:
.ps_image_wrapper{
	width:680px;
	height:450px;
	overflow:hidden;
	position:relative;
	margin:0 auto;
	-moz-box-shadow:0px 0px 5px #999;
	-webkit-box-shadow:0px 0px 5px #999;
	box-shadow:0px 0px 5px #999;
}
The image(s) inside of the wrapper should be of position absolute since we want to animate the left value to slide in the current image and slide out the previous one:
.ps_image_wrapper img{
	position:absolute;
	left:0px;
	top:0px;
}
The navigation elements will have the following style:
.ps_prev,
.ps_next{
	width:30px;
	height:59px;
	position:absolute;
	top:50%;
	margin-top:-40px;
	cursor:pointer;
	opacity:0.5;
}
.ps_prev{
	background:transparent url(../images/prev.png) no-repeat top center;
	left:-50px;
}
.ps_next{
	background:transparent url(../images/next.png) no-repeat top center;
	right:-50px;
}
.ps_prev:hover,
.ps_next:hover{
	opacity:0.9;
}
The dot list with the class “ps_nav” will be placed under the full image and centered by auto margins:
ul.ps_nav{
	list-style:none;
	margin:0;
	padding:0;
	width:170px;
	margin:20px auto;
	position:relative;
}
The dot list elements will float:
ul.ps_nav li{
	float:left;
}
And the inner link elements will get the dot background image, which is a sprites image:
ul.ps_nav li a{
	display:block;
	text-indent:-9000px;
	width:11px;
	height:11px;
	outline:none;
	padding:0px 3px;
	background:transparent url(../images/dot.png) no-repeat top center;
}
On hover we will change the background position to show the other half:
ul.ps_nav li a:hover,ul.ps_nav li.selected a{
	background-position:50% -11px;
}
Our special list element, the one that will have the thumbnail preview, will be of absolute positioning. The top has a negative value, since we want to pull this element up, beyond the list. The left value will be dynamically calculated. -34.5 pixel is the left value for the preview element when we want to show it over the first dot:
ul.ps_nav li.ps_preview{
	display:none;
	width:85px;
	height:91px;
	top:-95px;
	left:-34.5px; /*This we will calculate dynamically*/
	position:absolute;
}
The span will be the little triangle:
ul.ps_nav li.ps_preview span{
	background:transparent url(../images/triangle.png) no-repeat top center;
	width:15px;
	height:6px;
	position:absolute;
	top:85px;
	left:35px;
}
The preview wrapper will function the same way like the full image wrapper. We will hide the overflow:
.ps_preview_wrapper{
	width:75px;
	height:75px;
	border:5px solid #fff;
	overflow:hidden;
	position:relative;
	-moz-box-shadow:0px 0px 5px #999;
	-webkit-box-shadow:0px 0px 5px #999;
	box-shadow:0px 0px 5px #999;
}
And ultimately, we want the thumbnails to be of absolute positioning since we want to animate the left value for the sliding effect:
.ps_preview_wrapper img{
	position:absolute;
	top:0px;
	left:0px;
}
And that’s all the style. Let add the jQuery spice!
The JavaScript
The idea of this gallery is to show little thumbnails when hovering over a dot that represents and image.
When moving the cursor over the dots, we want to create a sliding animation that moves the next currently hovered thumbnail image into place. This will create a great effect, giving the illusion that we have an invisible bar of thumbnail images above the dots and our preview element makes them visible.
We also want the clicked image to show up by “pushing” the current one away, either from the left or from the right side.
Both effects we will achieve by placing the images or thumbs next to each other and animating their left value accordingly.
So, let’s begin by caching some elements:
var $ps_container		= $('#ps_container'),
	$ps_image_wrapper 	= $ps_container.find('.ps_image_wrapper'),
	$ps_next			= $ps_container.find('.ps_next'),
	$ps_prev			= $ps_container.find('.ps_prev'),
	$ps_nav				= $ps_container.find('.ps_nav'),
	$tooltip			= $ps_container.find('.ps_preview'),
	$ps_preview_wrapper = $tooltip.find('.ps_preview_wrapper'),
	$links				= $ps_nav.children('li').not($tooltip),
	total_images		= $links.length,
	currentHovered		= -1,
	current				= 0,
	$loader				= $('#loader');
(The loader element was not mentioned in the HTML structure since we placed it outside of the container. We want to show a loading element until all the images are loaded. In the download file you will be able to see the preload function for the images.)
Now we need to check if the browser is a real one or, for whatever insane reason, a crappy one like, let’s say, IE:
var ie 				= false;
if ($.browser.msie) {
	ie = true; // oh no sweet Jesus
}
if(!ie) // there is a God
	$tooltip.css({
		opacity	: 0
	}).show();
Basically, we want to give the preview element or tooltip the opacity 0 and animate it to 1 when we hover over it. Since in IE it does not help to simply add an opacity filter (elements inside are still shown) we want to use the show/hide instead of animating the opacity. So, we add display:none to the style of the class but take it out if we don’t use IE.
After preloading the images, we will show the container:
/*first preload images (thumbs and large images)*/
var loaded	= 0;
$links.each(function(i){
	var $link 	= $(this);
	$link.find('a').preload({
		onComplete	: function(){
			++loaded;
			if(loaded == total_images){
				//all images preloaded,
				//show ps_container and initialize events
				$loader.hide();
				$ps_container.show();
				//when mouse enters the the dots,
				//show the tooltip,
				//when mouse leaves hide the tooltip,
				//clicking on one will display the respective image
				$links.bind('mouseenter',showTooltip)
					  .bind('mouseleave',hideTooltip)
					  .bind('click',showImage);
				//navigate through the images
				$ps_next.bind('click',nextImage);
				$ps_prev.bind('click',prevImage);
			}
		}
	});
});
The function showTooltip() will show the thumbnails preview and animate it to the right place. It will also slide the thumbnails inside, either to the right or to the left, depending where we are “coming from”:
function showTooltip(){
var $link = $(this),
idx = $link.index(),
linkOuterWidth = $link.outerWidth(),
//this holds the left value for the next position
//of the tooltip
left = parseFloat(idx * linkOuterWidth) - $tooltip.width()/2 + linkOuterWidth/2,
//the thumb image source
$thumb = $link.find('a').attr('rel'),
imageLeft;
//if we are not hovering the current one
if(currentHovered != idx){
//check if we will animate left->right or right->left
if(currentHovered != -1){
if(currentHovered < idx){
imageLeft = 75;
}
else{
imageLeft = -75;
}
}
currentHovered = idx;
//the next thumb image to be shown in the tooltip
var $newImage = $('![]() ').css('left','0px')
.attr('src',$thumb);
//if theres more than 1 image
//(if we would move the mouse too fast it would probably happen)
//then remove the oldest one (:last)
if($ps_preview_wrapper.children().length > 1)
$ps_preview_wrapper.children(':last').remove();
//prepend the new image
$ps_preview_wrapper.prepend($newImage);
var $tooltip_imgs = $ps_preview_wrapper.children(),
tooltip_imgs_count = $tooltip_imgs.length;
//if theres 2 images on the tooltip
//animate the current one out, and the new one in
if(tooltip_imgs_count > 1){
$tooltip_imgs.eq(tooltip_imgs_count-1)
.stop()
.animate({
left:-imageLeft+'px'
},150,function(){
//remove the old one
$(this).remove();
});
$tooltip_imgs.eq(0)
.css('left',imageLeft + 'px')
.stop()
.animate({
left:'0px'
},150);
}
}
//if we are not using a "browser", we just show the tooltip,
//otherwise we fade it in
//
if(ie)
$tooltip.css('left',left + 'px').show();
else
$tooltip.stop()
.animate({
left : left + 'px',
opacity : 1
},150);
}
').css('left','0px')
.attr('src',$thumb);
//if theres more than 1 image
//(if we would move the mouse too fast it would probably happen)
//then remove the oldest one (:last)
if($ps_preview_wrapper.children().length > 1)
$ps_preview_wrapper.children(':last').remove();
//prepend the new image
$ps_preview_wrapper.prepend($newImage);
var $tooltip_imgs = $ps_preview_wrapper.children(),
tooltip_imgs_count = $tooltip_imgs.length;
//if theres 2 images on the tooltip
//animate the current one out, and the new one in
if(tooltip_imgs_count > 1){
$tooltip_imgs.eq(tooltip_imgs_count-1)
.stop()
.animate({
left:-imageLeft+'px'
},150,function(){
//remove the old one
$(this).remove();
});
$tooltip_imgs.eq(0)
.css('left',imageLeft + 'px')
.stop()
.animate({
left:'0px'
},150);
}
}
//if we are not using a "browser", we just show the tooltip,
//otherwise we fade it in
//
if(ie)
$tooltip.css('left',left + 'px').show();
else
$tooltip.stop()
.animate({
left : left + 'px',
opacity : 1
},150);
}

The function hideTooltip() simply fades out the thumbnails preview (or hides it if IE):
function hideTooltip(){
	//hide / fade out the tooltip
	if(ie)
		$tooltip.hide();
	else
	$tooltip.stop()
			.animate({
				opacity		: 0
			},150);
}
The following function will show an image in full size and animate the wrapper around to the right size. The new image will “slide into place”:
function showImage(e){
var $link = $(this),
idx = $link.index(),
$image = $link.find('a').attr('href'),
$currentImage = $ps_image_wrapper.find('img'),
currentImageWidth = $currentImage.width();
//if we click the current one return
if(current == idx) return false;
//add class selected to the current page / dot
$links.eq(current).removeClass('selected');
$link.addClass('selected');
//the new image element
var $newImage = $('![]() ').css('left',currentImageWidth + 'px')
.attr('src',$image);
//if the wrapper has more than one image, remove oldest
if($ps_image_wrapper.children().length > 1)
$ps_image_wrapper.children(':last').remove();
//prepend the new image
$ps_image_wrapper.prepend($newImage);
//the new image width
//this will be the new width of the ps_image_wrapper
var newImageWidth = $newImage.width();
//check animation direction
if(current > idx){
$newImage.css('left',-newImageWidth + 'px');
currentImageWidth = -newImageWidth;
}
current = idx;
//animate the new width of the ps_image_wrapper
//(same like new image width)
$ps_image_wrapper.stop().animate({
width : newImageWidth + 'px'
},350);
//animate the new image in
$newImage.stop().animate({
left : '0px'
},350);
//animate the old image out
$currentImage.stop().animate({
left : -currentImageWidth + 'px'
},350);
e.preventDefault();
}
').css('left',currentImageWidth + 'px')
.attr('src',$image);
//if the wrapper has more than one image, remove oldest
if($ps_image_wrapper.children().length > 1)
$ps_image_wrapper.children(':last').remove();
//prepend the new image
$ps_image_wrapper.prepend($newImage);
//the new image width
//this will be the new width of the ps_image_wrapper
var newImageWidth = $newImage.width();
//check animation direction
if(current > idx){
$newImage.css('left',-newImageWidth + 'px');
currentImageWidth = -newImageWidth;
}
current = idx;
//animate the new width of the ps_image_wrapper
//(same like new image width)
$ps_image_wrapper.stop().animate({
width : newImageWidth + 'px'
},350);
//animate the new image in
$newImage.stop().animate({
left : '0px'
},350);
//animate the old image out
$currentImage.stop().animate({
left : -currentImageWidth + 'px'
},350);
e.preventDefault();
}
The navigation functions will simply trigger a click event on the dots (which we already took care of in the beginning):
function nextImage(){
	if(current < total_images){ 		$links.eq(current+1).trigger('click'); 	} } function prevImage(){ 	if(current > 0){
		$links.eq(current-1).trigger('click');
	}
}
And that’s all! We hope you enjoyed the sweet thumbnails tutorial and find it useful!


wow ! mary lou rocks _
luv it……….
It’s not works for me.
First time everything looks fine.
But when I click button to show next image, it’s dissapears with animation and doesn’t show up.I just see arrows and buttons with previews.. and no images. Btw it’s looks like great gallery.
Browser: Chromium 10.0.643.0 (71740)
Are you sure about your browser version? Because the latest beta version of Chrome is 9.0.597.67…
sweet indeed
one more time, clap clap clap !!!
excellent tutorial, great result !!!
thanks for your explanation and to be shared with the comunity !
Impressive… like everthing you do 🙂
Yes, I’m sure.
I’m using Chromium(Google Chrome based on Chromium and almost the same)
My Google Chrome version is: 10.0.642.0 downloaded from here: http://tools.google.com/dlpage/chromesxs
But I’m using Chromium 10.0.643.0
Mary Lou
It’s not working in Mac Safari 5.0.3 either.
Well done, but not working on Safari.
Great !
it works fine on Safari (5.03), Chrome (8.8.552) and Firefox (3.6.13) all on my MacBook
🙂
The demo is not working on my safari too. I know this is just a tutorial, and it is a free tutorial, but do you think you can give the coding a second look?
Thank you. 🙂
Hey Marry, it looks and works great. Nice for small picture gallery, I will try to use it in future project. Your tutorial is also great… It helps us learn and understand new jquery tricks, because its fairly easy to understand your code written with comments.
Thanks for this great resource.
Running Arch linux and wont work on Chromium 8.0.552.237, but works on Firefox.
Hej! Not working for me either in Chrome 8.0.552.237 – image disappears after mouseclick on any of the thumbnails and nothing comes back.
Hi all, thanks a lot for your feedback, we’ll definitely give it a second look, but it’s going to be hard to find the problem, since it works fine on my Google Chrome 8.0.552.237, Internet Explorer 7 and 8, Firefox 3.6.16, Safari 5.0.3 (Win), Opera 11 and even the Safari Version on my iPad.
So, any suggestions? 🙂 Did somebody download the ZIP and try out the demo locally?
Thank you all, cheers, ML
Thank you for sharing. Very good tutorial.
Hi, could you guys try to see if it works with this version : http://tympanus.net/Tutorials/SweetThumbnails/test/?
Thanks,
ML
Hey Mary, i like ur works. all works great. Thank you.
Working great here with Chrome 10.0.634.
http://a.yfrog.com/img611/4821/h58.png
Hi Mary, thanks for taking action on the comments. The test version is not working on my Safari 5.0.3 (MAC) too. Point over the dot, I see the thumbnail, after I clicked, nothing happened. In Firefox (MAC), all the small dots have gone. But it work fine on my chrome (MAC).
gracias por compartir
Not working in Chrome 8.0.552.237 on a Mac.
Would be great to have it working in all browser since it is GREAT!
so sweet for thumbnails image trick…as the owner of this website is also co cweet…xixixi :”>
http://tympanus.net/Tutorials/SweetThumbnails/test/ still not work.
Current version is: 10.0.645.0 (72095) Tried on Windows 7 SP1 and Ubuntu 11.04
wow. just downloaded source. and local version works fine in latest chromium.
superbe! is there any way of including a caption or a title?
Thank you for this great source and tutorial.
I was just wondering if you could share the perfect method of handling 3 galleries in the same page…
I’m loving this script! I’m just having an issue with what i guess is the attached css file. I’m building my website with dreamweaver and i’m also using wordpress. When i upload the script to my server, the style elements from the attached css are changing the font style. I’ve tried to delete that line from the css file, but it’s still doing the same thing. Any tips?
Oh, Awesome. as usual thanks Mary thanks
Hey Mary 🙂 I love all of your work, it’s definitely inspiring! I was wondering if there was a way to just use the sub menu? I’ve been trying to play with the code, and it’s dependent on the pre load…so i get the loading icon when something is altered. Any help?
Thanks again for the great TUT, and keep up the awesome work 😛
-Sin
Hi Sin, check out our new post, it explains exactly that, we did a new plugin-like version that you can easily re-use. Hope it helps and thank you! Cheers, ML
Great tutorial. I like the thumbnail transitions. Your other tutorials are great as well. Thanks.
Great tutorial Mary Lou, Is there any chance you will add an auto play?
Cheers! and Keep up the good work!
Thank’s has opened my eyes to JQuery animation. I am a designer not understand code, and now after seeing your tutorial I want to learn code, thanks a lot have become my inspiration. 🙂
Absolutely delicious!
Thank you!
As always it`s simply an amazing and delightful work, thanks for sharing your knowledge with us.
great! nothing else!
Demo is not working on Chrome 9.0.597.84 on Fedora 14 Linux 🙂
Didn’t try to download and test locally.
Best,
Jozsef
Doesn’t work Here on Safari 5.03 Mac, but works on Chrome and FF.
Will be great gallery after full working fix!!
Can I use auto slide show?
yo how to make the gallery not centering? maybe a little to right
which line in cs should i change?
i try modified margin but it no use 🙁
could you tell me …
ill be verry happy
u make a great stuff!!!
Hi Yeoung, you can go to the class “ul.ps_nav” in the css and change the margin to for example “margin: 10px 0px”. It is the “auto” for the left and right margin that centers the list. Hope it helps, cheers, ML
is SweetThumbnails a plugin for wordpres?
Hey Mary Lou, great tutorial. I was having the same problem with Chrome. It loads the first image but none after that. The problem was in the Adblock extension, after I turn off it works like a charm.
I´m trying to find ways to solve that problem. Any tips?
thanks
I’m having a very difficult time trying to enable more than one on a single page.
I was able to get this working on a page but there’s no images. I added the location in the href but all it does it open in image in a window.
Any help please?
ML – Awesome gallery, I am using for a kids soccer team and it works well. On the initial load I get white space next to the right side of the picture any ideas?
Still not work on chrome …
v 9.0.597.98
Thank you for this great source and tutorial.
But I have prob when I use it whith more than 10 img. The dot take 2 or 3 line but the tooltip didn’t pass to the next line… How can I do?
Thank for all
Wonderful gallery…just beautiful. I am curious if the opening image can be one other than the widest of the images one wishes to show? If so can it also be centered horizontally and with the -moz-box-shadow, -webkit-box-shadow and box-shadow css?
Does this script have a built-in ability to add captions?
Is there a way to make it into a slideshow? Love this script by the way!
Hi, Mary?
How auto slide this gallery?
Hey mary,
First I would like to thank you for the awesome coding and tutorial 🙂 but I was wondering how I could adjust the coding if I wanted to use the gallery four times on the same page. ( I tried it and only the first gallery functions properly…) Thanks again!
Beautiful!
I would like to increase the size of thumbnails, what should I change?