From our sponsor: Leverage AI for dynamic, custom website builds with ease.
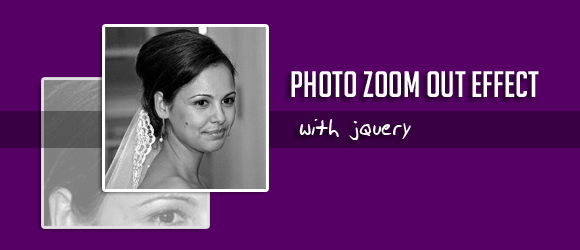
Today we will show you how to create a simple image zoom out effect with jQuery. The idea is show some images which are zoomed in initially and when hovering over an image it gets zoomed out. This effect could be used in photography websites or image galleries. Our example uses some black and white images to focus on the effect.
Ok, let’s get started.
The Markup
We will create some wrappers for the images which will be divs. These wrappers will hide any overflow, because we don’t want the picture (which will be much bigger) to show completely. Inside we will have a link element that surrounds the image:
<div class="wrap">
	<a href="http://www.flickr.com/photos/archetypefotografie/3601313864/">
		<img src="images/image1.jpg" alt="Picture 1"/>
	</a>
</div>
<div class="wrap">
	<a href="http://www.flickr.com/photos/vegaseddie/3910559910/">
		<img src="images/image2.jpg" alt="Picture 2"/>
	</a>
</div>
<div class="wrap">
	<a href="http://www.flickr.com/photos/62337512@N00/445175934/">
		<img src="images/image3.jpg" alt="Picture 3"/>
	</a>
</div>
<div class="wrap">
	<a href="http://www.flickr.com/photos/brunociampi/2461177417/">
		<img src="images/image4.jpg" alt="Picture 4"/>
	</a>
</div>
<div class="wrap">
	<a href="http://www.flickr.com/photos/beadmobile/3298460491/">
		<img src="images/image5.jpg" alt="Picture 5"/>
	</a>
</div>
<div class="wrap">
	<a href="http://www.flickr.com/photos/tonythemisfit/3839281139/">
		<img src="images/image6.jpg" alt="Picture 6"/>
	</a>
</div>
All images have the same size (500px times 333px) because we want the effect to be the same on each image. You can use images of a different size, but keep in mind that you need to adapt the JavaScript function in order to achieve a smooth effect.
The CSS
The wrapper for the link and the image will float left and have relative positioning. The image will have absolute positioning and we will define the top and left in a way that it centers the image:
.wrap{
    width:200px;
    height:200px;
    margin:0px;
    overflow:hidden;
    position:relative;
    float:left;
}
.wrap a img{
    border:none;
    position:absolute;
    top:-66.5px;
    left:-150px;
    height:500px;
    opacity: 0.5;
}
As mentioned before, the image has a height of 333px. We want the image to be “zoomed in” initially so we set the size bigger. In this case we chose to set it to a height of 500px. When setting the size of just one side, the image will resize accordingly and you don’t have to worry about the other value.
With the JavaScript function we will then zoom the image out.
The JavaScript
The function for hovering over the images will be pretty straightforward: we make the image opaque, change the height to 200px and set the top and left to zero. When moving the mouse out we will set the style back to the initial one:
$(function() {
	$('#container img').hover(
		function(){
			var $this = $(this);
			$this.stop().animate({
					'opacity':'1.0',
					'height':'200px',
					'top':'0px',
					'left':'0px'
				});
		},
		function(){
			var $this = $(this);
			$this.stop().animate({
				'opacity':'0.5',
				'height':'500px',
				'top':'-66.5px',
				'left':'-150px'
				});
		}
	);
});
And that’s it!
Enjoy!